Beginner’s Guide to Hosting Your Webflow Site on AWS S3
Webflow empowers designers and startups to build beautiful, interactive websites with zero code. However, Webflow’s hosting—while impressive—may not suit everyone’s budget or offer the full flexibility some users demand. One popular alternative is exporting your Webflow site and hosting it on Amazon S3, which provides scalable, reliable, and cost-effective static site hosting. If you’ve ever wondered how to move your Webflow site off-platform and onto AWS, this beginner’s guide is for you!
Why Host Your Webflow Site on AWS S3?
- Cost Savings: S3 offers low-cost static file hosting, perfect for portfolio sites, landing pages, and blogs.
- Performance: AWS S3 is built for speed and can be paired with CloudFront for global CDN distribution.
- Control: You maintain full control over your files, domain, and deployment process.
- Scalability: S3 handles any traffic volume without need for complex infrastructure.
Step 1: Export Your Webflow Site
Before you can host your site on AWS S3, you must export its static files—HTML, CSS, JavaScript, images, and other assets. Webflow’s native export button is a great start for basic static sites, but it comes with two major limitations:
- CMS content is not included in exports (even on paid plans).
- Badge removal and full media export can be tricky.
This is where ExFlow comes in. ExFlow.site is an advanced exporter built to give you greater freedom:
- Export all static content and CMS pages (including dynamic items).
- Download CSS, JS, image/media files.
- Remove the Webflow badge and add your own custom scripts or stylesheets.
- Export all pages as .html files for easy hosting.
- One-click exports to S3, FTP, Git, or download as ZIP.
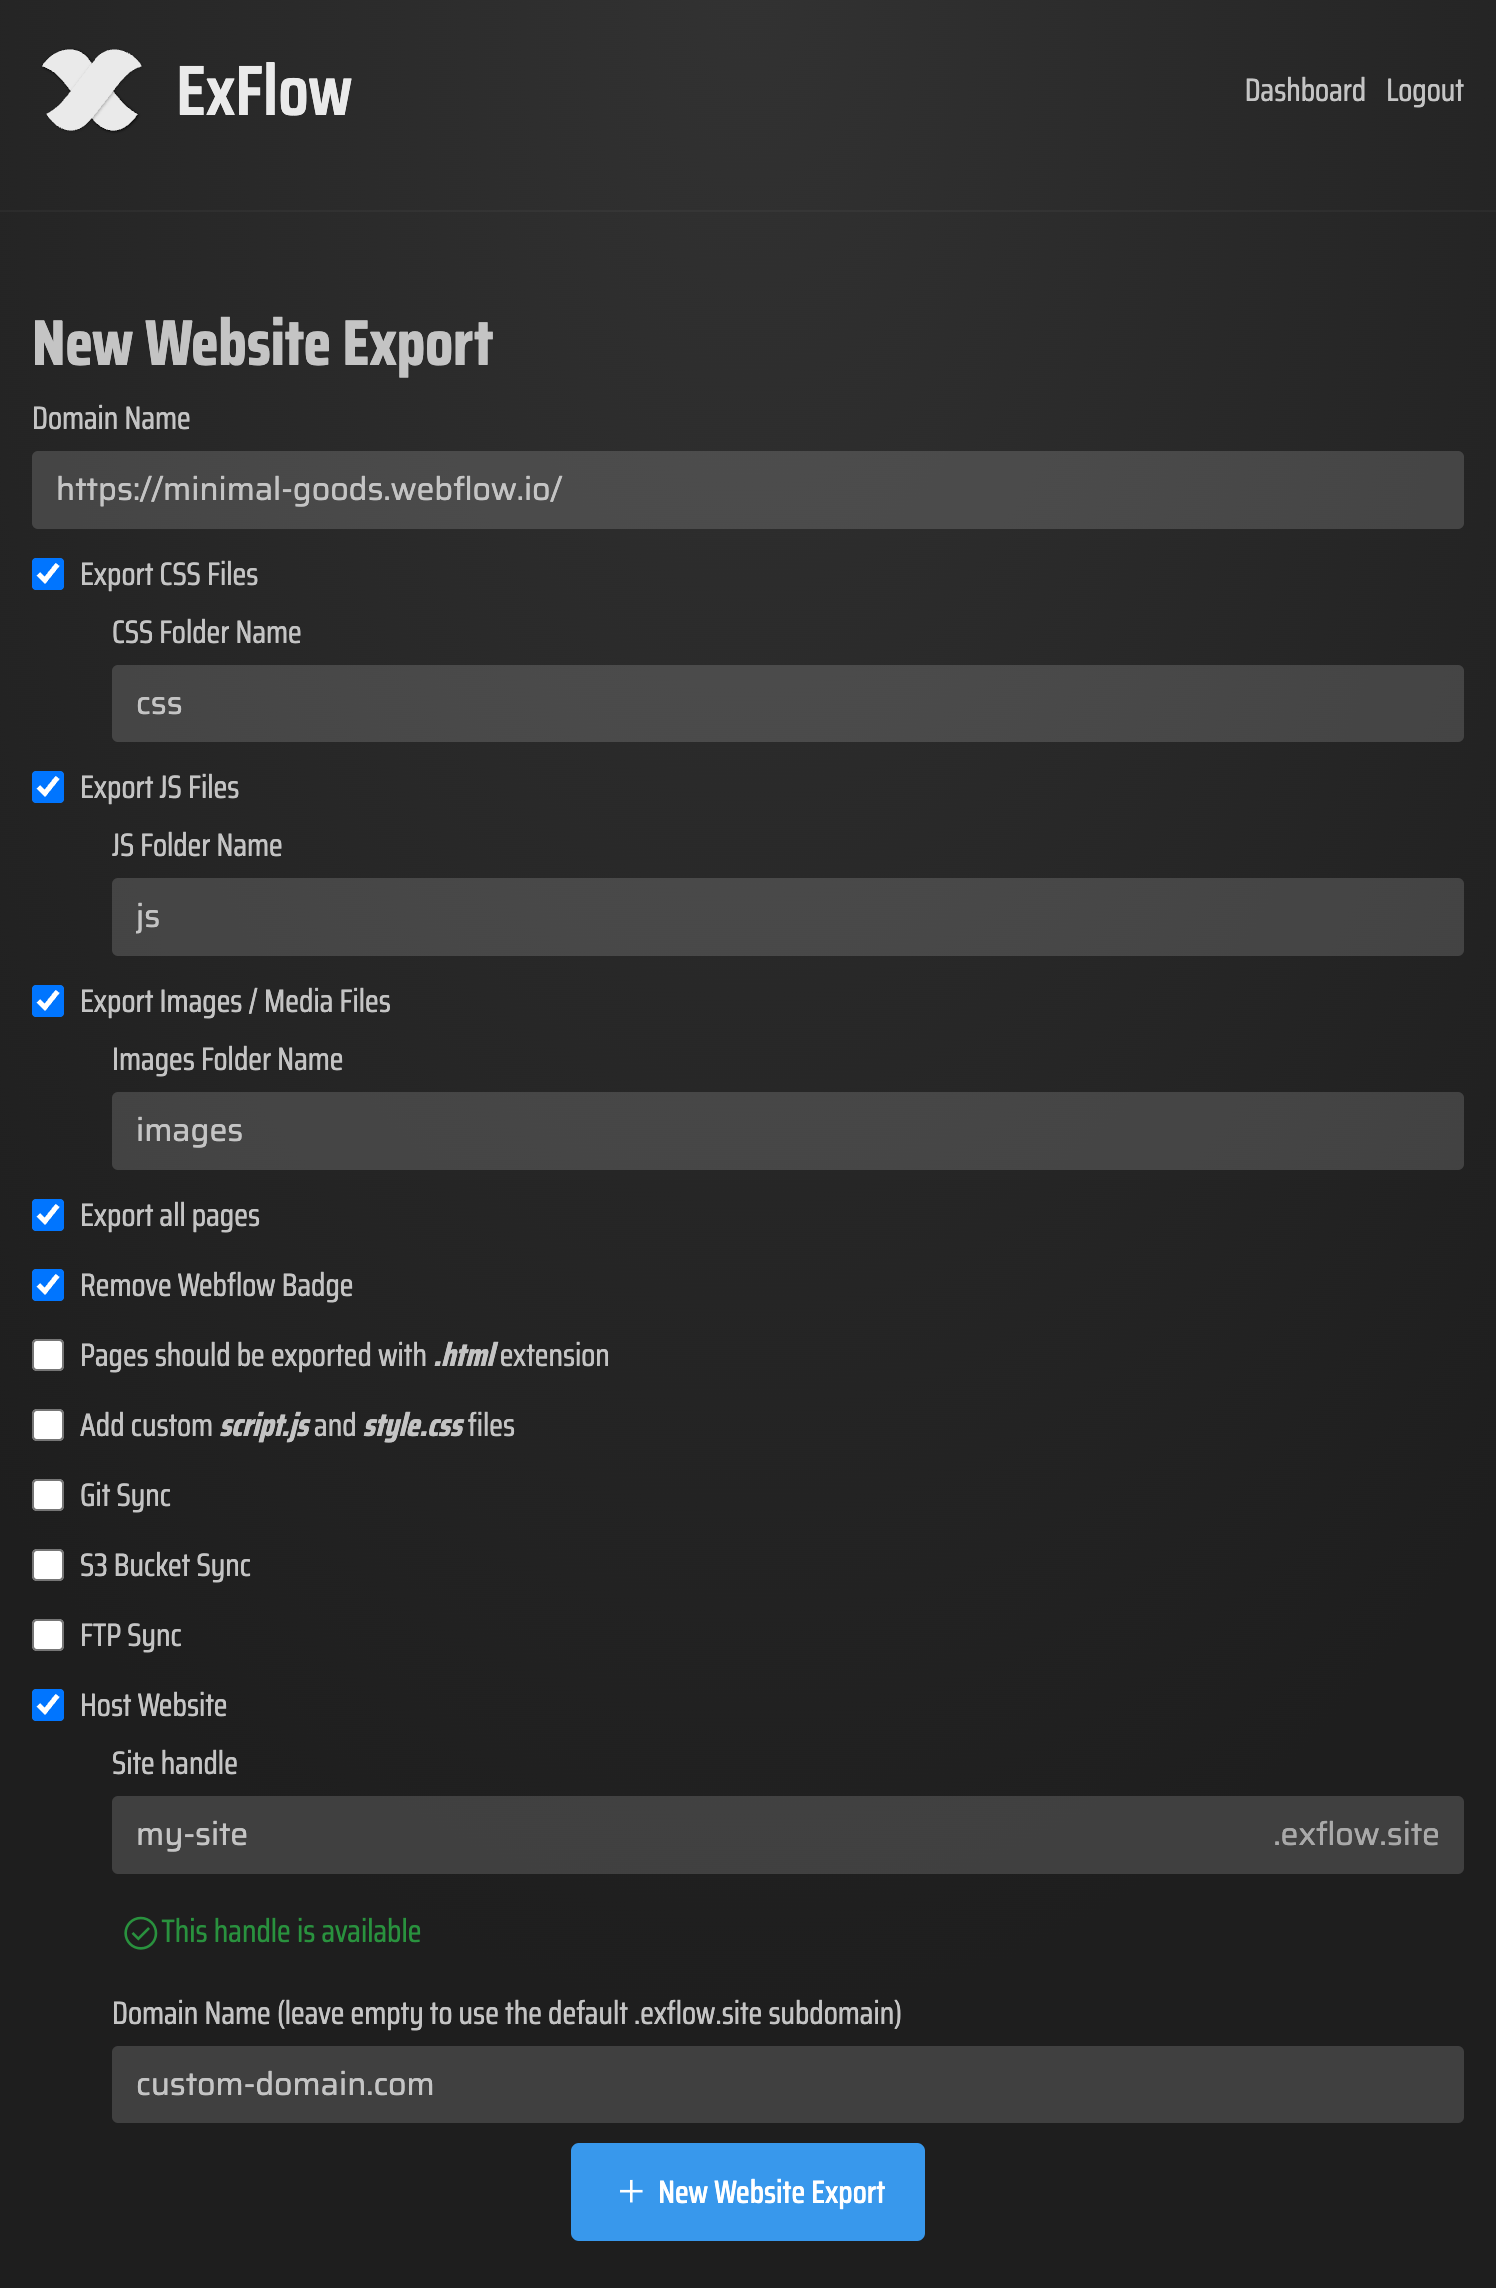
Here’s a quick screenshot of the ExFlow export interface:
Step 2: Prepare Your AWS S3 Bucket
- Log into your AWS Console and navigate to S3.
- Click Create bucket and specify a unique name (e.g.,
my-webflow-site). - Leave the defaults, and create the bucket.
- Once created, click your bucket name to enter its configuration dashboard.
Enable Static Website Hosting
- Go to the Properties tab.
- Scroll down to Static website hosting and click Edit.
- Enable static website hosting. Set the
index.html(anderror.htmlif present). - Save changes. AWS provides a public website URL for your bucket.
Step 3: Upload Your Exported Webflow Site
If you used ExFlow to export your site, you may automatically sync your files to S3 directly from the tool—just enter your AWS credentials and bucket name as prompted. Otherwise, you can manually upload:
- From the S3 dashboard, click Upload, then drag and drop your exported files (HTML, CSS, JS, images, etc).
- After uploading, select all files and under Actions choose Make public (or update bucket policy for broader access).
Step 4: Link a Custom Domain (Optional)
To use a custom domain (like www.yoursite.com), configure Route 53 (AWS’s DNS) or point your domain provider’s records to the S3 website address. For HTTPS, consider setting up CloudFront as a CDN and SSL provider—Amazon’s documentation makes this process smooth.
Step 5: Enjoy Fast, Affordable Webflow Hosting
You’re now running your Webflow site on AWS, with outstanding performance and full control! As your skills grow, you can explore more advanced S3 configurations or add a CDN for even faster global delivery.
Why Use ExFlow for Webflow Exports?
- Freedom: Export the entire site, including CMS content.
- Badge removal and clean code outputs help with branding and SEO.
- Automated S3 syncing for hands-off deployment.
- Hosting add-ons: ExFlow even offers direct hosting and lets you link custom domains if you want a simple all-in-one solution.
Don’t just take our word for it – check out this step-by-step video guide:
Conclusion
Exporting and hosting your Webflow site on AWS S3 gives you complete control, enhanced speed, and big savings. Tools like ExFlow make this process beginner-friendly—eliminating the traditional pain points of exporting CSV data, CMS content, and assets. Give ExFlow a try at exflow.site and open up a world of flexible, affordable Webflow hosting solutions!


Comments
Post a Comment