How To Create Lifestyle Product Photos That Boost Shopify Conversions
If your product photos only show items on a plain white background, you’re leaving money on the table. High-converting Shopify stores use lifestyle product photos to add context, emotion, and trust—so shoppers can instantly picture the product in their world.
In this guide, you’ll learn a repeatable workflow to turn basic images into conversion-ready lifestyle visuals using AI. We’ll cover composition, lighting, model try-ons, object placement, and how to test what actually lifts your conversion rate.
Why Lifestyle Product Photos Increase Conversions
Lifestyle images show your product in use, in a believable environment. This reduces uncertainty and boosts shopper confidence—two key drivers of add-to-cart and conversion rate.
- Context: Helps the shopper understand size, use case, and vibe instantly.
- Emotion: Evokes desire and solves the “Can I see it in my life?” question.
- Credibility: Realistic settings, consistent lighting, and on-model shots build trust.
- Scannability: Lifestyle hero images improve CTR from collection pages to PDPs.
The Five Essentials of a High-Converting Lifestyle Shot
1) Clarity first: The product remains the star—crisp edges, accurate color, and visible key features. 2) Consistent lighting: Natural or soft studio light; avoid mixed color temperatures. 3) Realistic context: Surfaces, props, and environments that align with your brand and buyer persona. 4) Strong composition: Rule of thirds, leading lines, and negative space for overlays or badges. 5) Brand cohesion: Repeatable angles, color palette, and styling across your catalog.
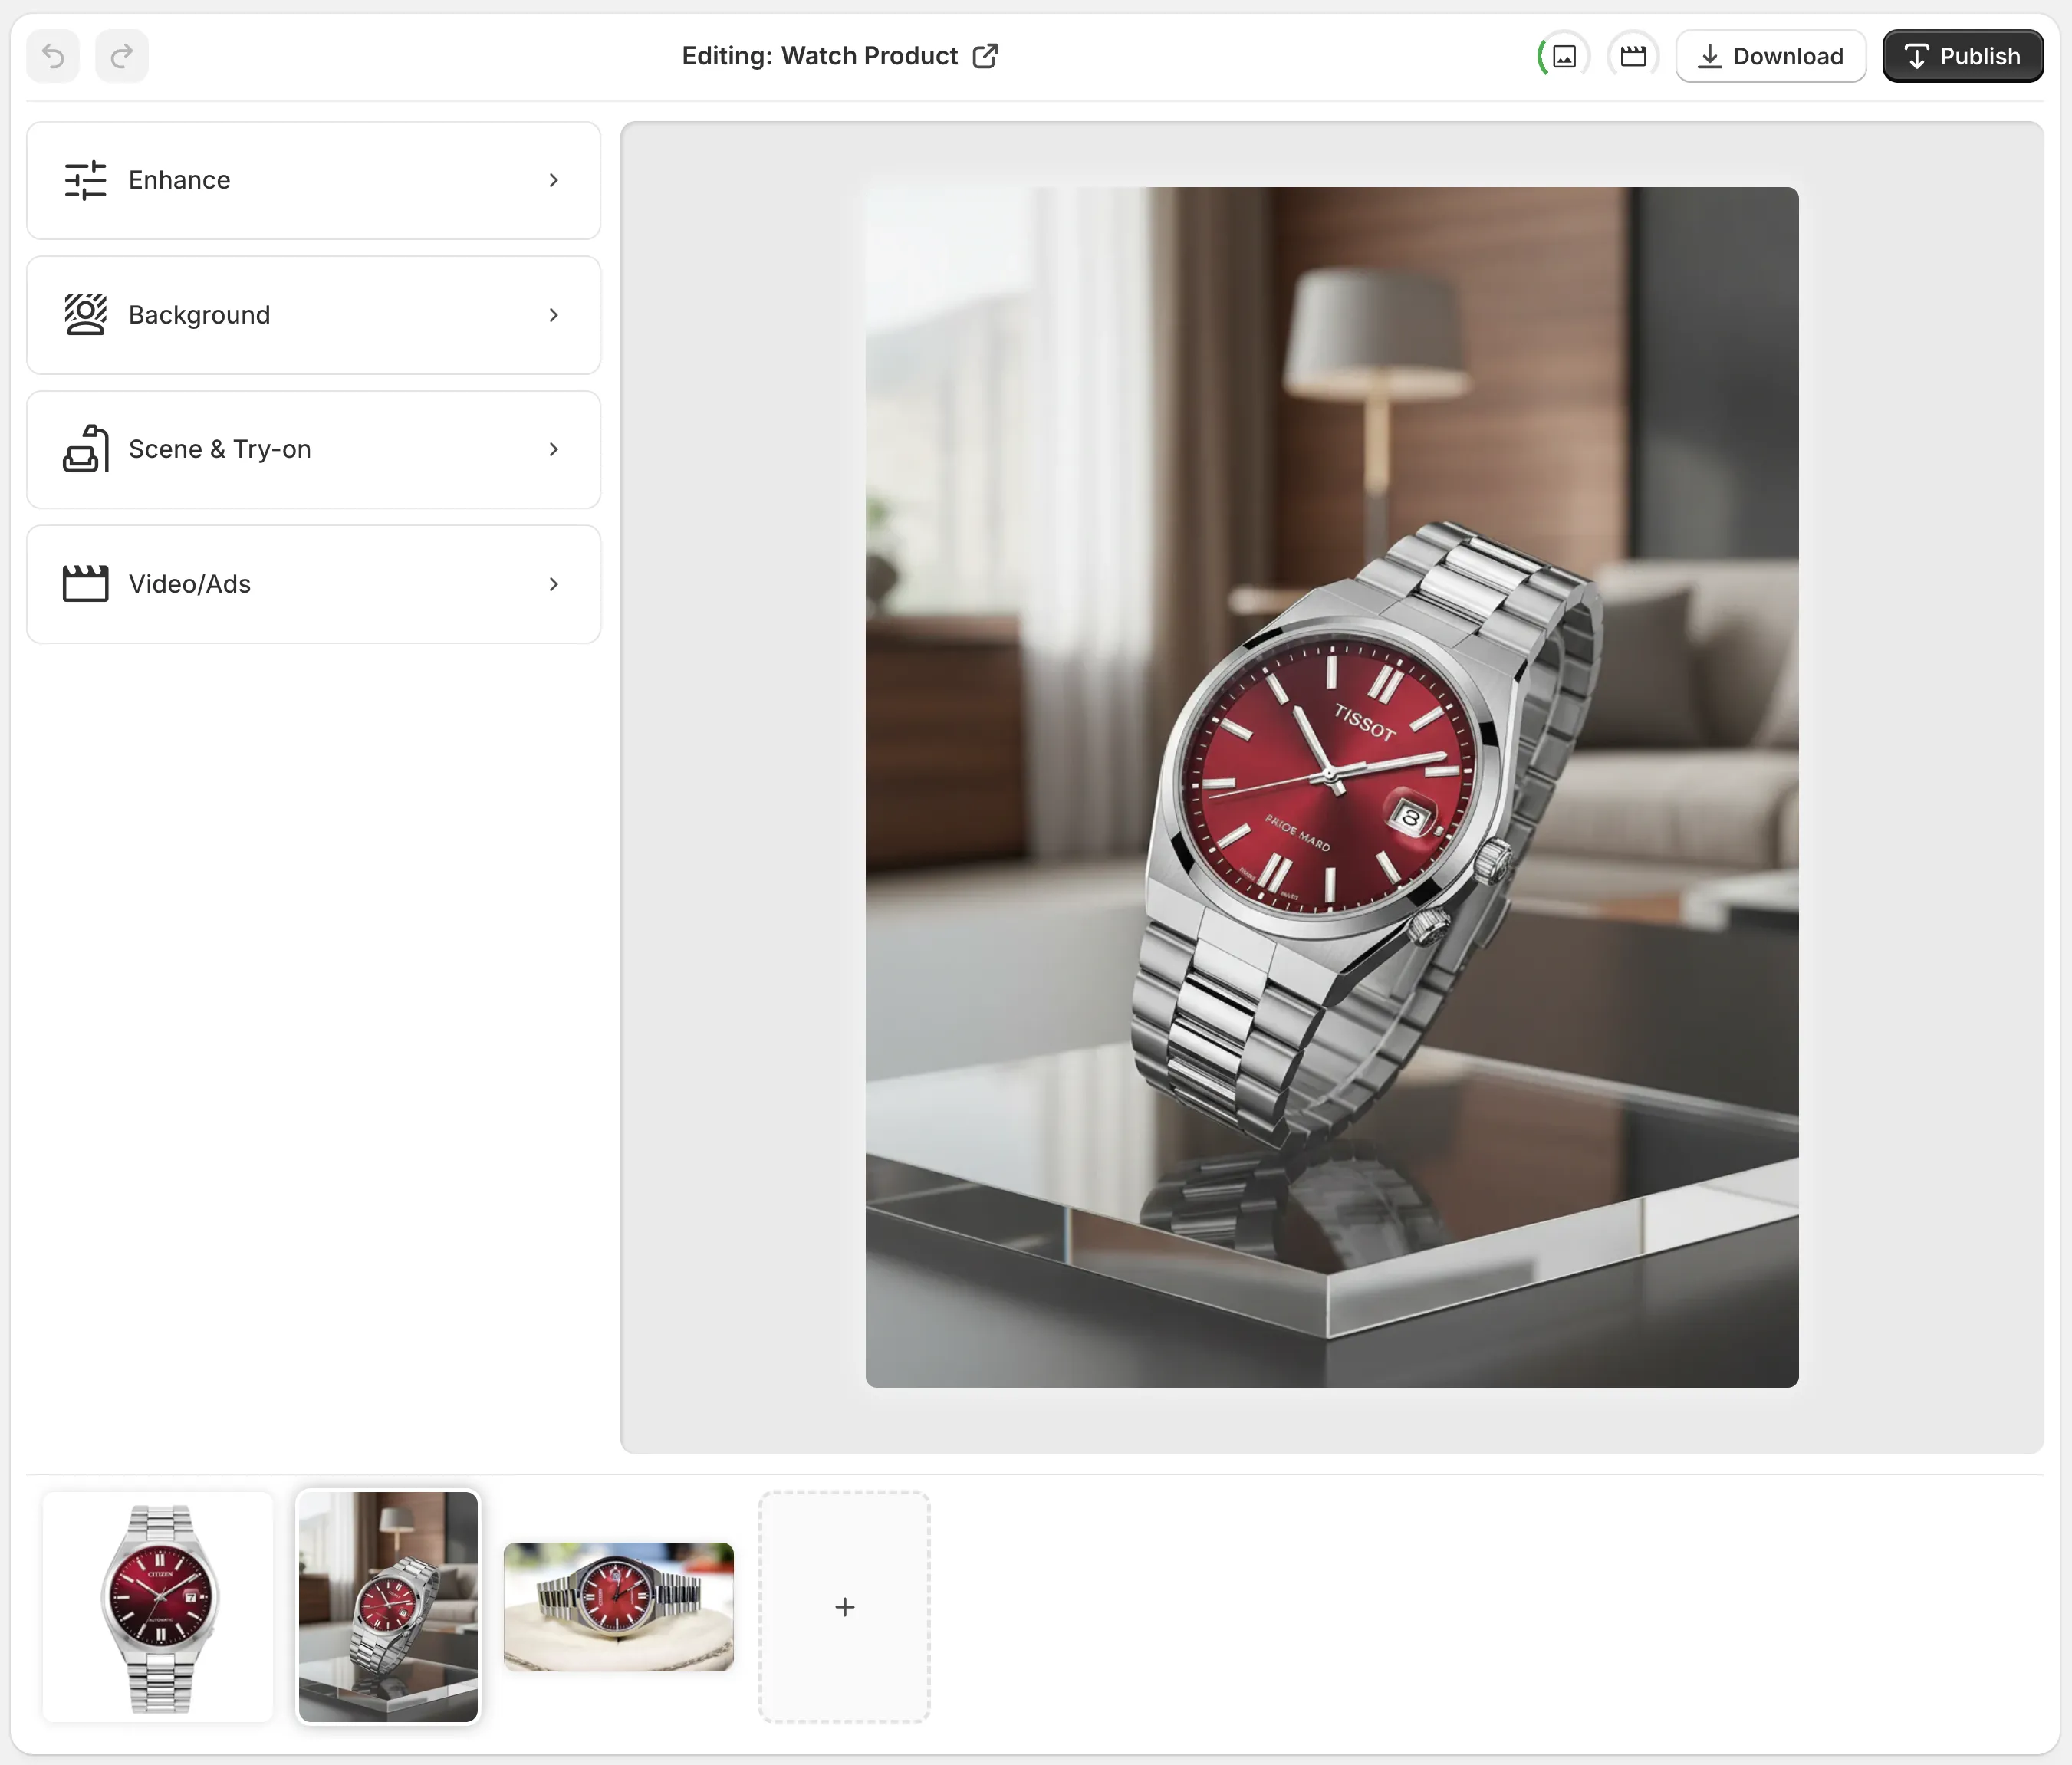
A Fast, Repeatable Workflow With AI
You can create studio-grade lifestyle photos in minutes using Supra AI Photo Studio, a Shopify app that enhances, places, and styles your products with AI. Install it here: Supra AI Photo Studio on Shopify. Explore the full feature set on the official landing page.
Step 1: Start With the Cleanest Base
- Upload your product image.
- Use Background Remover to isolate the product and eliminate distractions.
- Upscale if needed to protect detail on zoom (2–4x is ideal for PDP magnification).
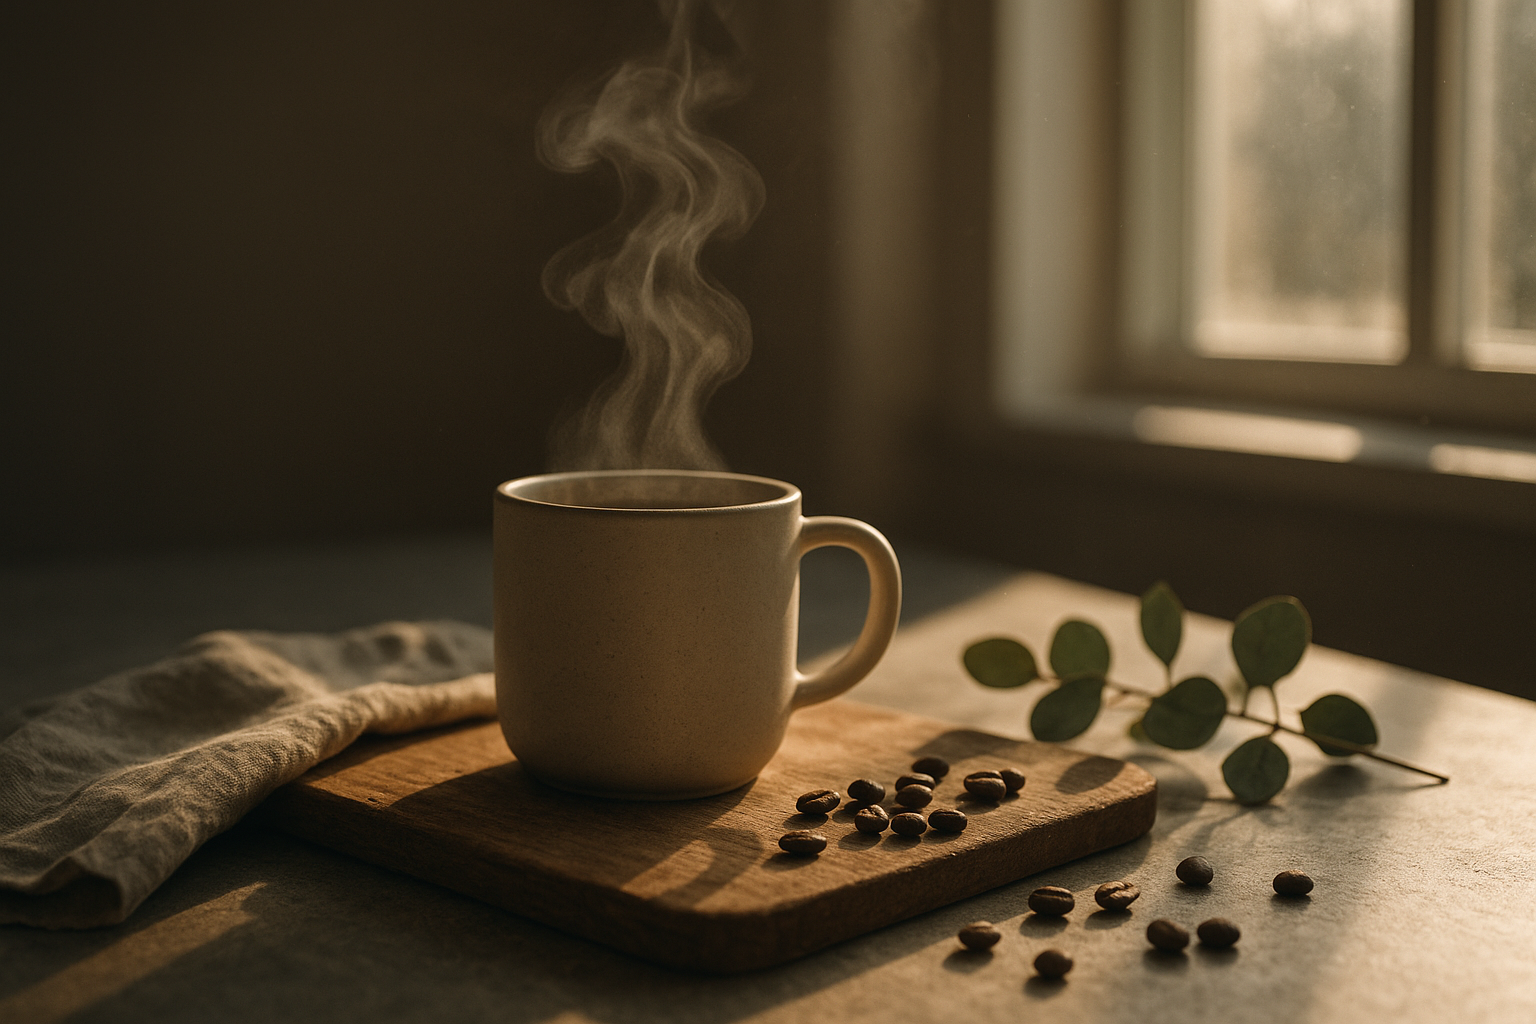
Step 2: Place the Product in a Lifestyle Scene
Use Object Placement to generate realistic environments that match your brand:
- Choose environment: studio, luxury boutique, kitchen, office, outdoors, etc.
- Pick surface type: marble, wood, linen, acrylic, concrete.
- Set camera angle: top-down for flat lays, 45° for dimensionality, eye-level for realism.
- Select lighting mood: soft window light, golden hour, moody contrast, editorial.

Pro tip: Keep prop color temperatures aligned with your product palette. For example, warm wood and linen for earthy brands; glass, steel, and marble for premium tech or beauty.
Step 3: Fashion? Use AI Try-On for On-Model Accuracy
For apparel, jewelry, and accessories, on-model shots outperform flat lays.
- Generate realistic models with different poses, skin tones, and body types.
- Maintain product accuracy (fit, fabric detail, gemstone reflections).
- Create multiple personas for different audiences (minimalist, streetwear, athleisure).

Step 4: Auto-Enhance for Conversion-Ready Clarity
- Apply auto lighting correction to balance exposure and contrast.
- Use denoise/deblur sparingly to keep textures crisp.
- Ensure true-to-life color—especially for fashion, cosmetics, and home decor.
Step 5: Add Motion: UGC & B‑Roll for PDPs and Ads
Lifestyle video increases time on page and improves ROAS in paid campaigns.
- Use B‑roll generator for cinematic product drops, slow motion, or splash effects.
- Create UGC-style videos from a single image—choose the voice, vibe, and setting for Reels/TikTok.

See it in action: Watch the demo trailer.
Step 6: Publish, A/B Test, and Optimize
- Export in 1:1 or 4:5 for PDPs; keep a wide hero (16:9) for banners.
- Add descriptive alt text for SEO, e.g., “Matte black bottle on marble bathroom counter under soft window light.”
- A/B test primary images: lifestyle vs. plain, different angles, close-ups vs. full scene.
- Track CTR from collection to PDP and conversion rate uplift over 7–14 days.
Proven CRO Tips for Lifestyle Product Photography
- Mobile-first framing: Ensure the focal point stays clear at small sizes.
- One hero, one detail: Start with a lifestyle hero, then show a macro texture shot second.
- Repetition builds trust: Use the same angle and lighting across a collection.
- Visual size cues: Add familiar objects (hand, book, keyboard) to communicate scale.
- Keep copy space: Leave negative space for badges (Free Shipping) or short benefit text.
- Avoid over-staging: Two to three props max; everything should reinforce the product’s story.
Quick Checklist You Can Reuse
- Product isolated and upscaled for crisp zoom.
- Environment matches brand persona and price point.
- Lighting consistent (no color cast, no harsh clipping highlights).
- Composition with rule of thirds and clean copy space.
- Accurate colors and textures (especially for fabrics and finishes).
- Video variation generated (UGC or b‑roll) for ads and PDP.
- Alt text written and filenames keyworded for SEO.
- A/B test planned with clear success metric (conversion rate or ATC rate).
Why Use Supra AI Photo Studio
- End-to-end workflow inside Shopify admin.
- Studio-quality enhancements (background replacement, resolution, lighting).
- AI Try-On for apparel and accessories with realistic models.
- Object placement for instant lifestyle scenes in kitchens, boutiques, outdoors, and more.
- Automatic UGC and b‑roll video generation to boost engagement and ROAS.
Get started in minutes: Install Supra AI Photo Studio or learn more on the official site.
P.S. Want a visual guide to the editor? Here’s a quick peek:
Create lifestyle photos that sell, not just show. Your next conversion lift is one image away.


Comments
Post a Comment