How to Turn One Product Photo Into Studio-Ready Shopify Assets
If your product photos are technically fine but still not doing much for the store, the problem is usually not the camera. It is the lack of usable variations. One clean shot is not enough when you need product-page clarity, lifestyle context, try-on visuals, and short ad clips.
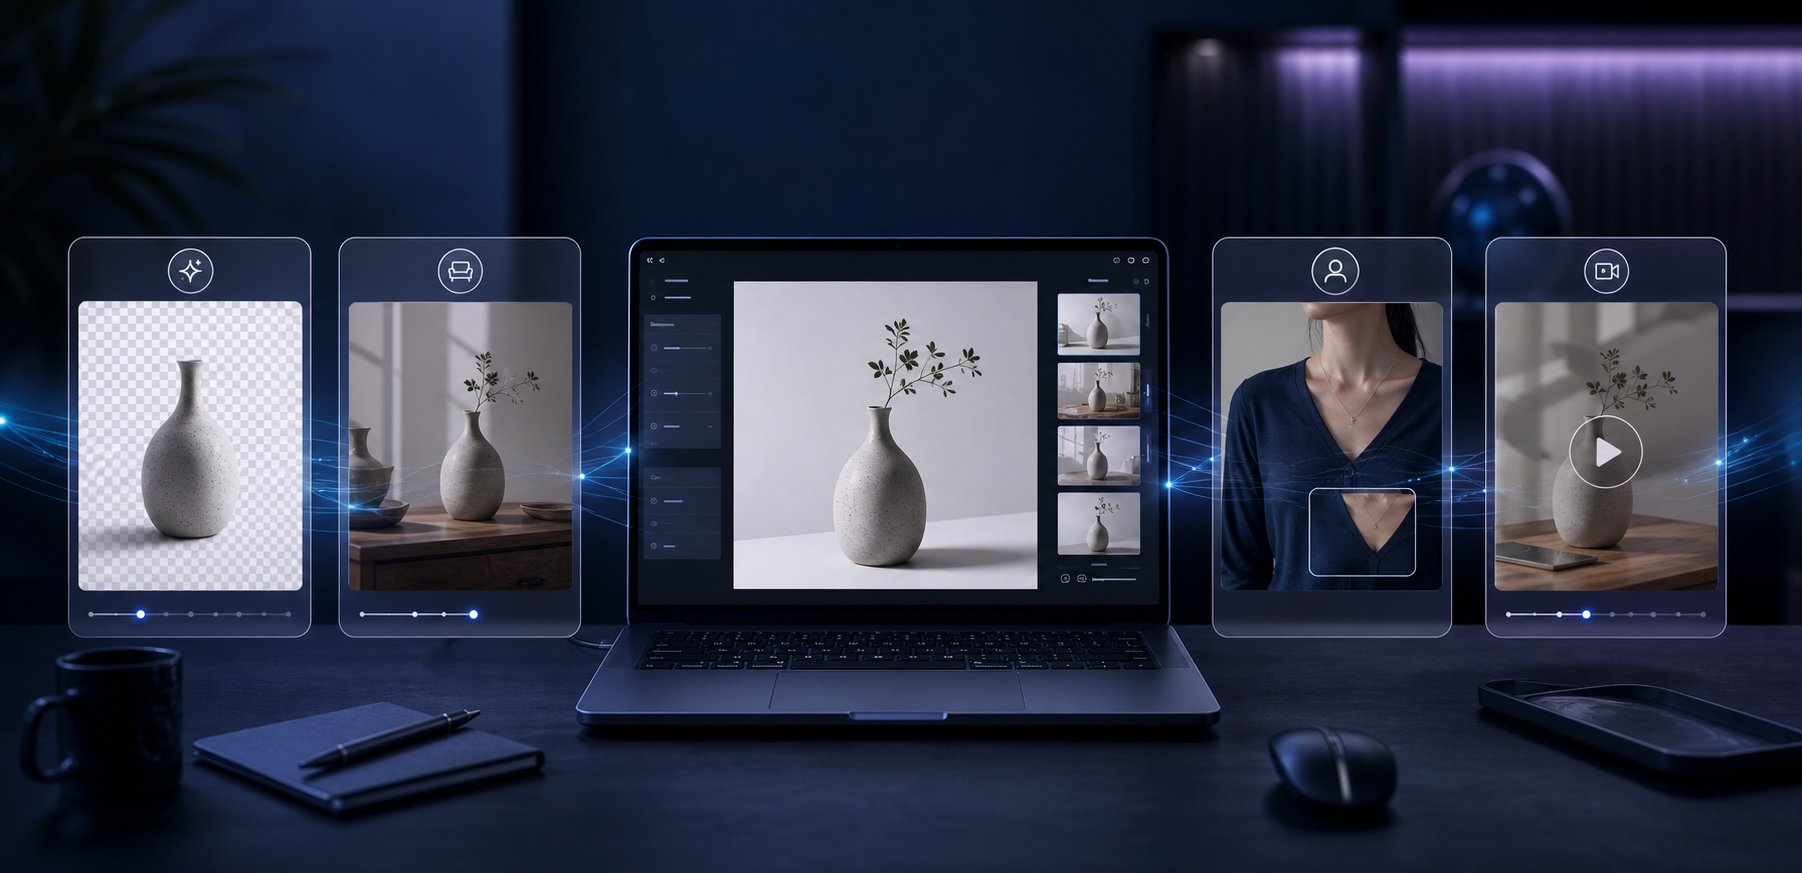
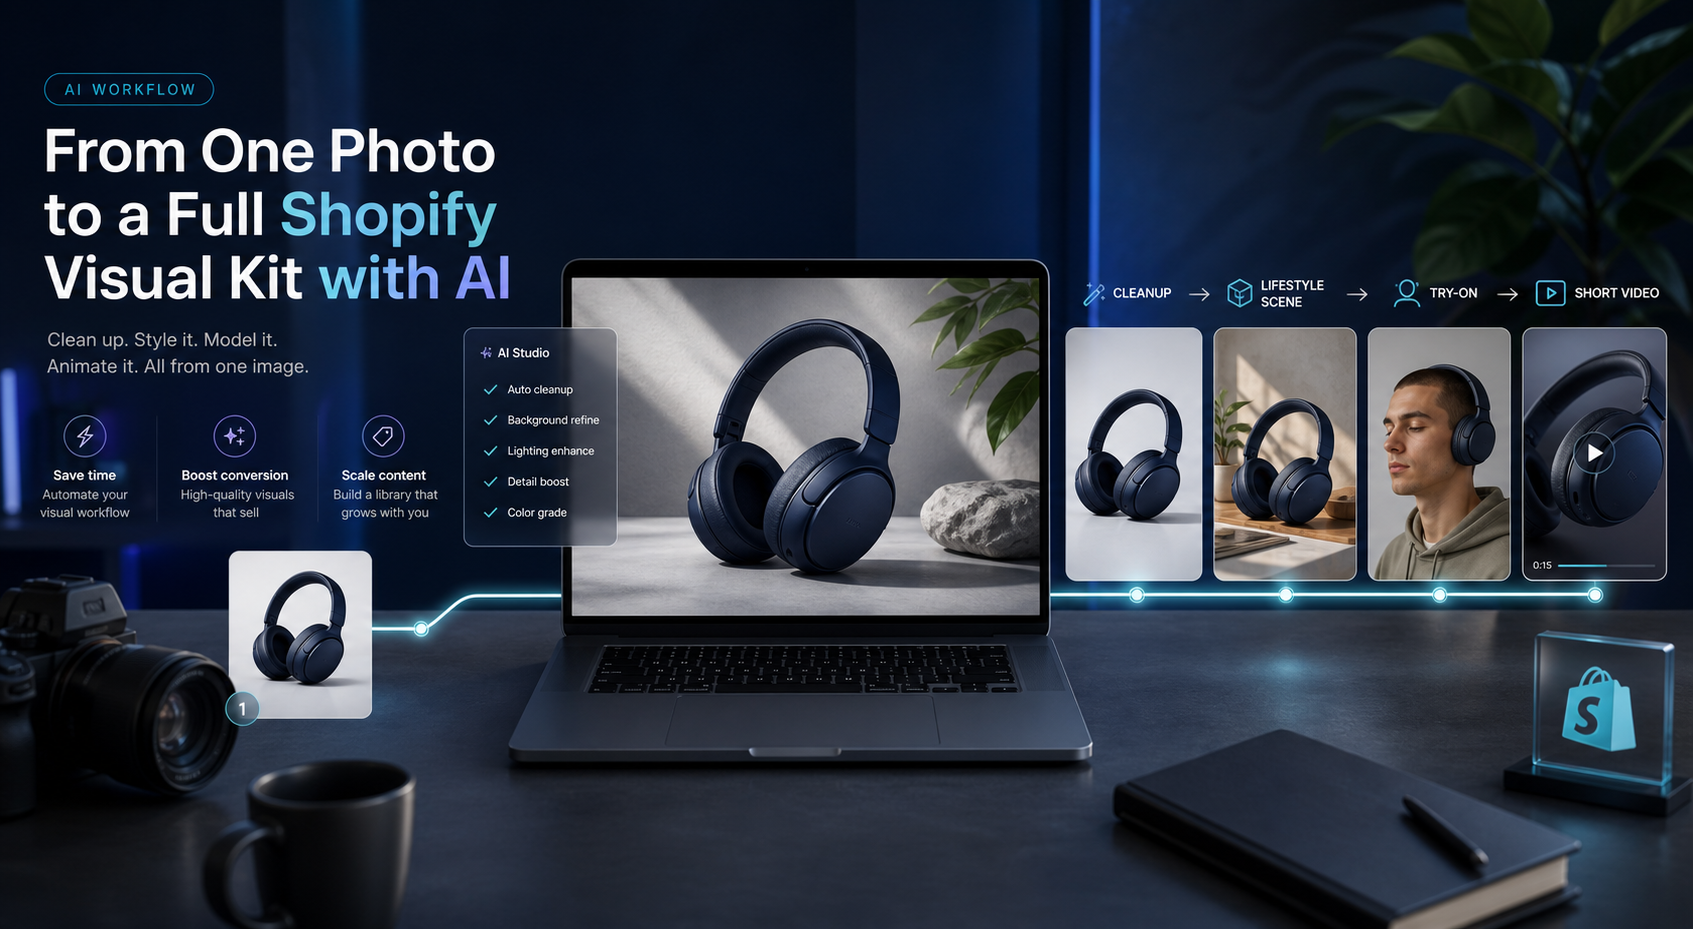
That is the gap Supra AI Photo Studio is trying to fill. The app turns existing product photos into cleaner, more usable marketing assets inside Shopify, and the landing page shows the main workflow clearly: background removal, image upscaling, auto enhance, object placement, AI try-on, UGC videos, b-roll videos, and mockup embedding.
Start With the Source Photo You Already Trust
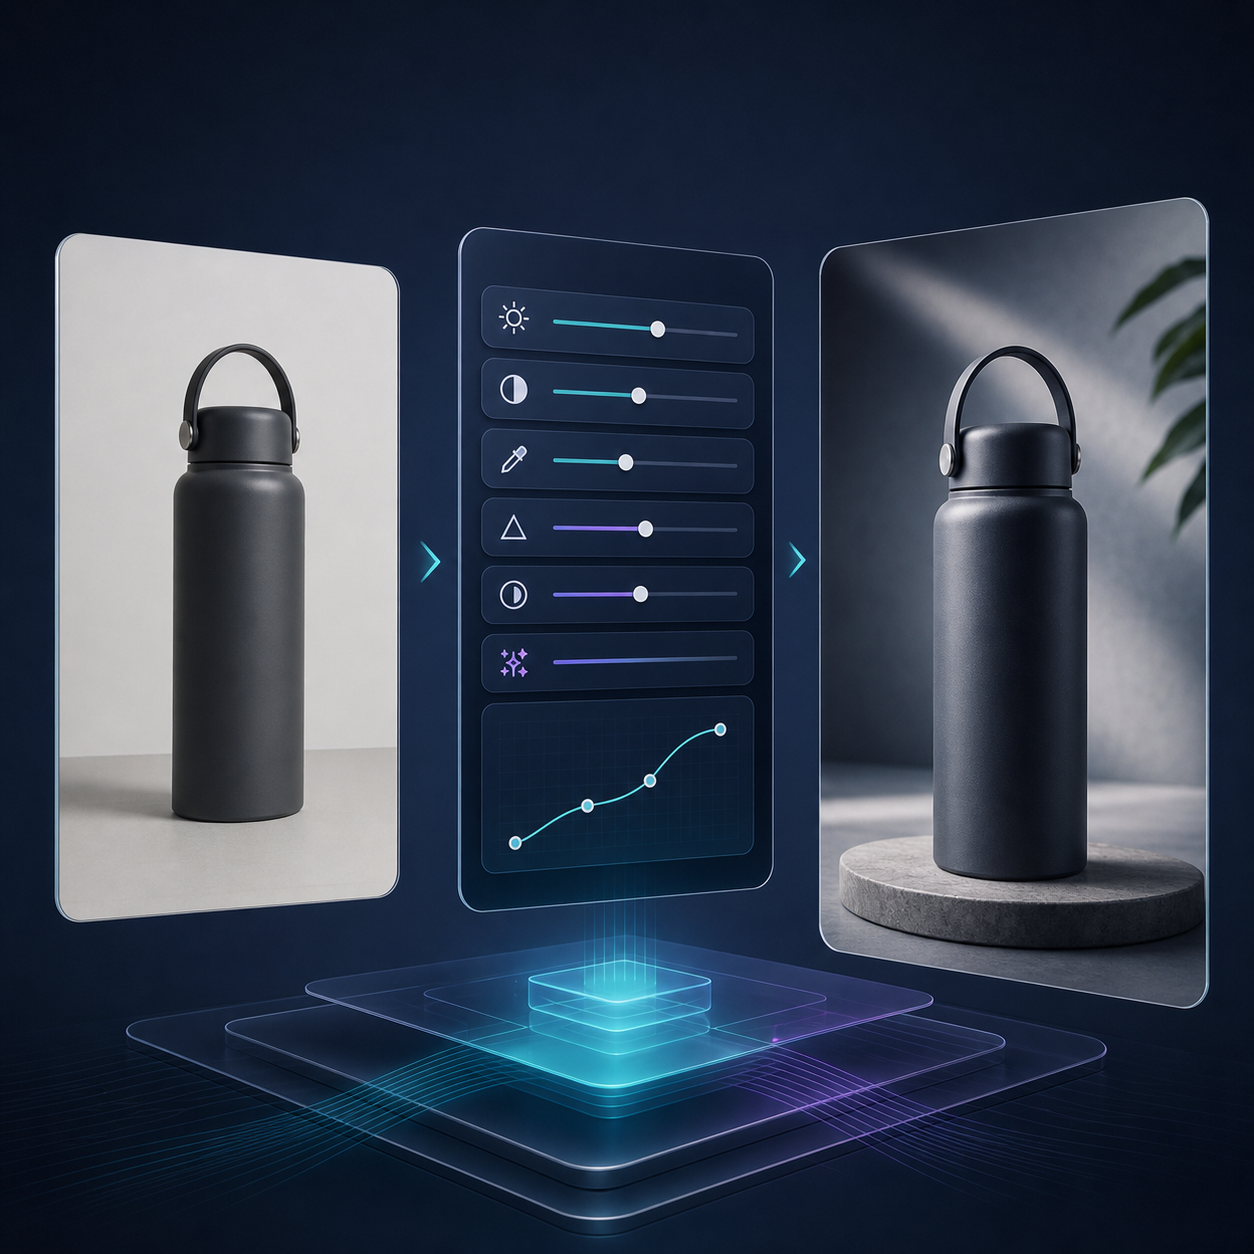
The first rule is simple: do not ask AI to rescue a bad source image. Start with the best plain shot you already have, then use the tool to improve what is already there.
That is where Supra AI Photo Studio is most practical. The app includes background removal, upscaling, auto enhance for denoising, deblurring, color, and lighting, plus more advanced tools like try-on and object placement. In other words, it covers the boring cleanup work and the more valuable downstream variations.
For a Shopify merchant, that matters because the same product can need different outputs for different channels. A product page wants clarity. A collection page wants consistency. Ads want motion. Social wants context. If each of those outputs starts from a separate manual edit, the workflow gets slow fast.
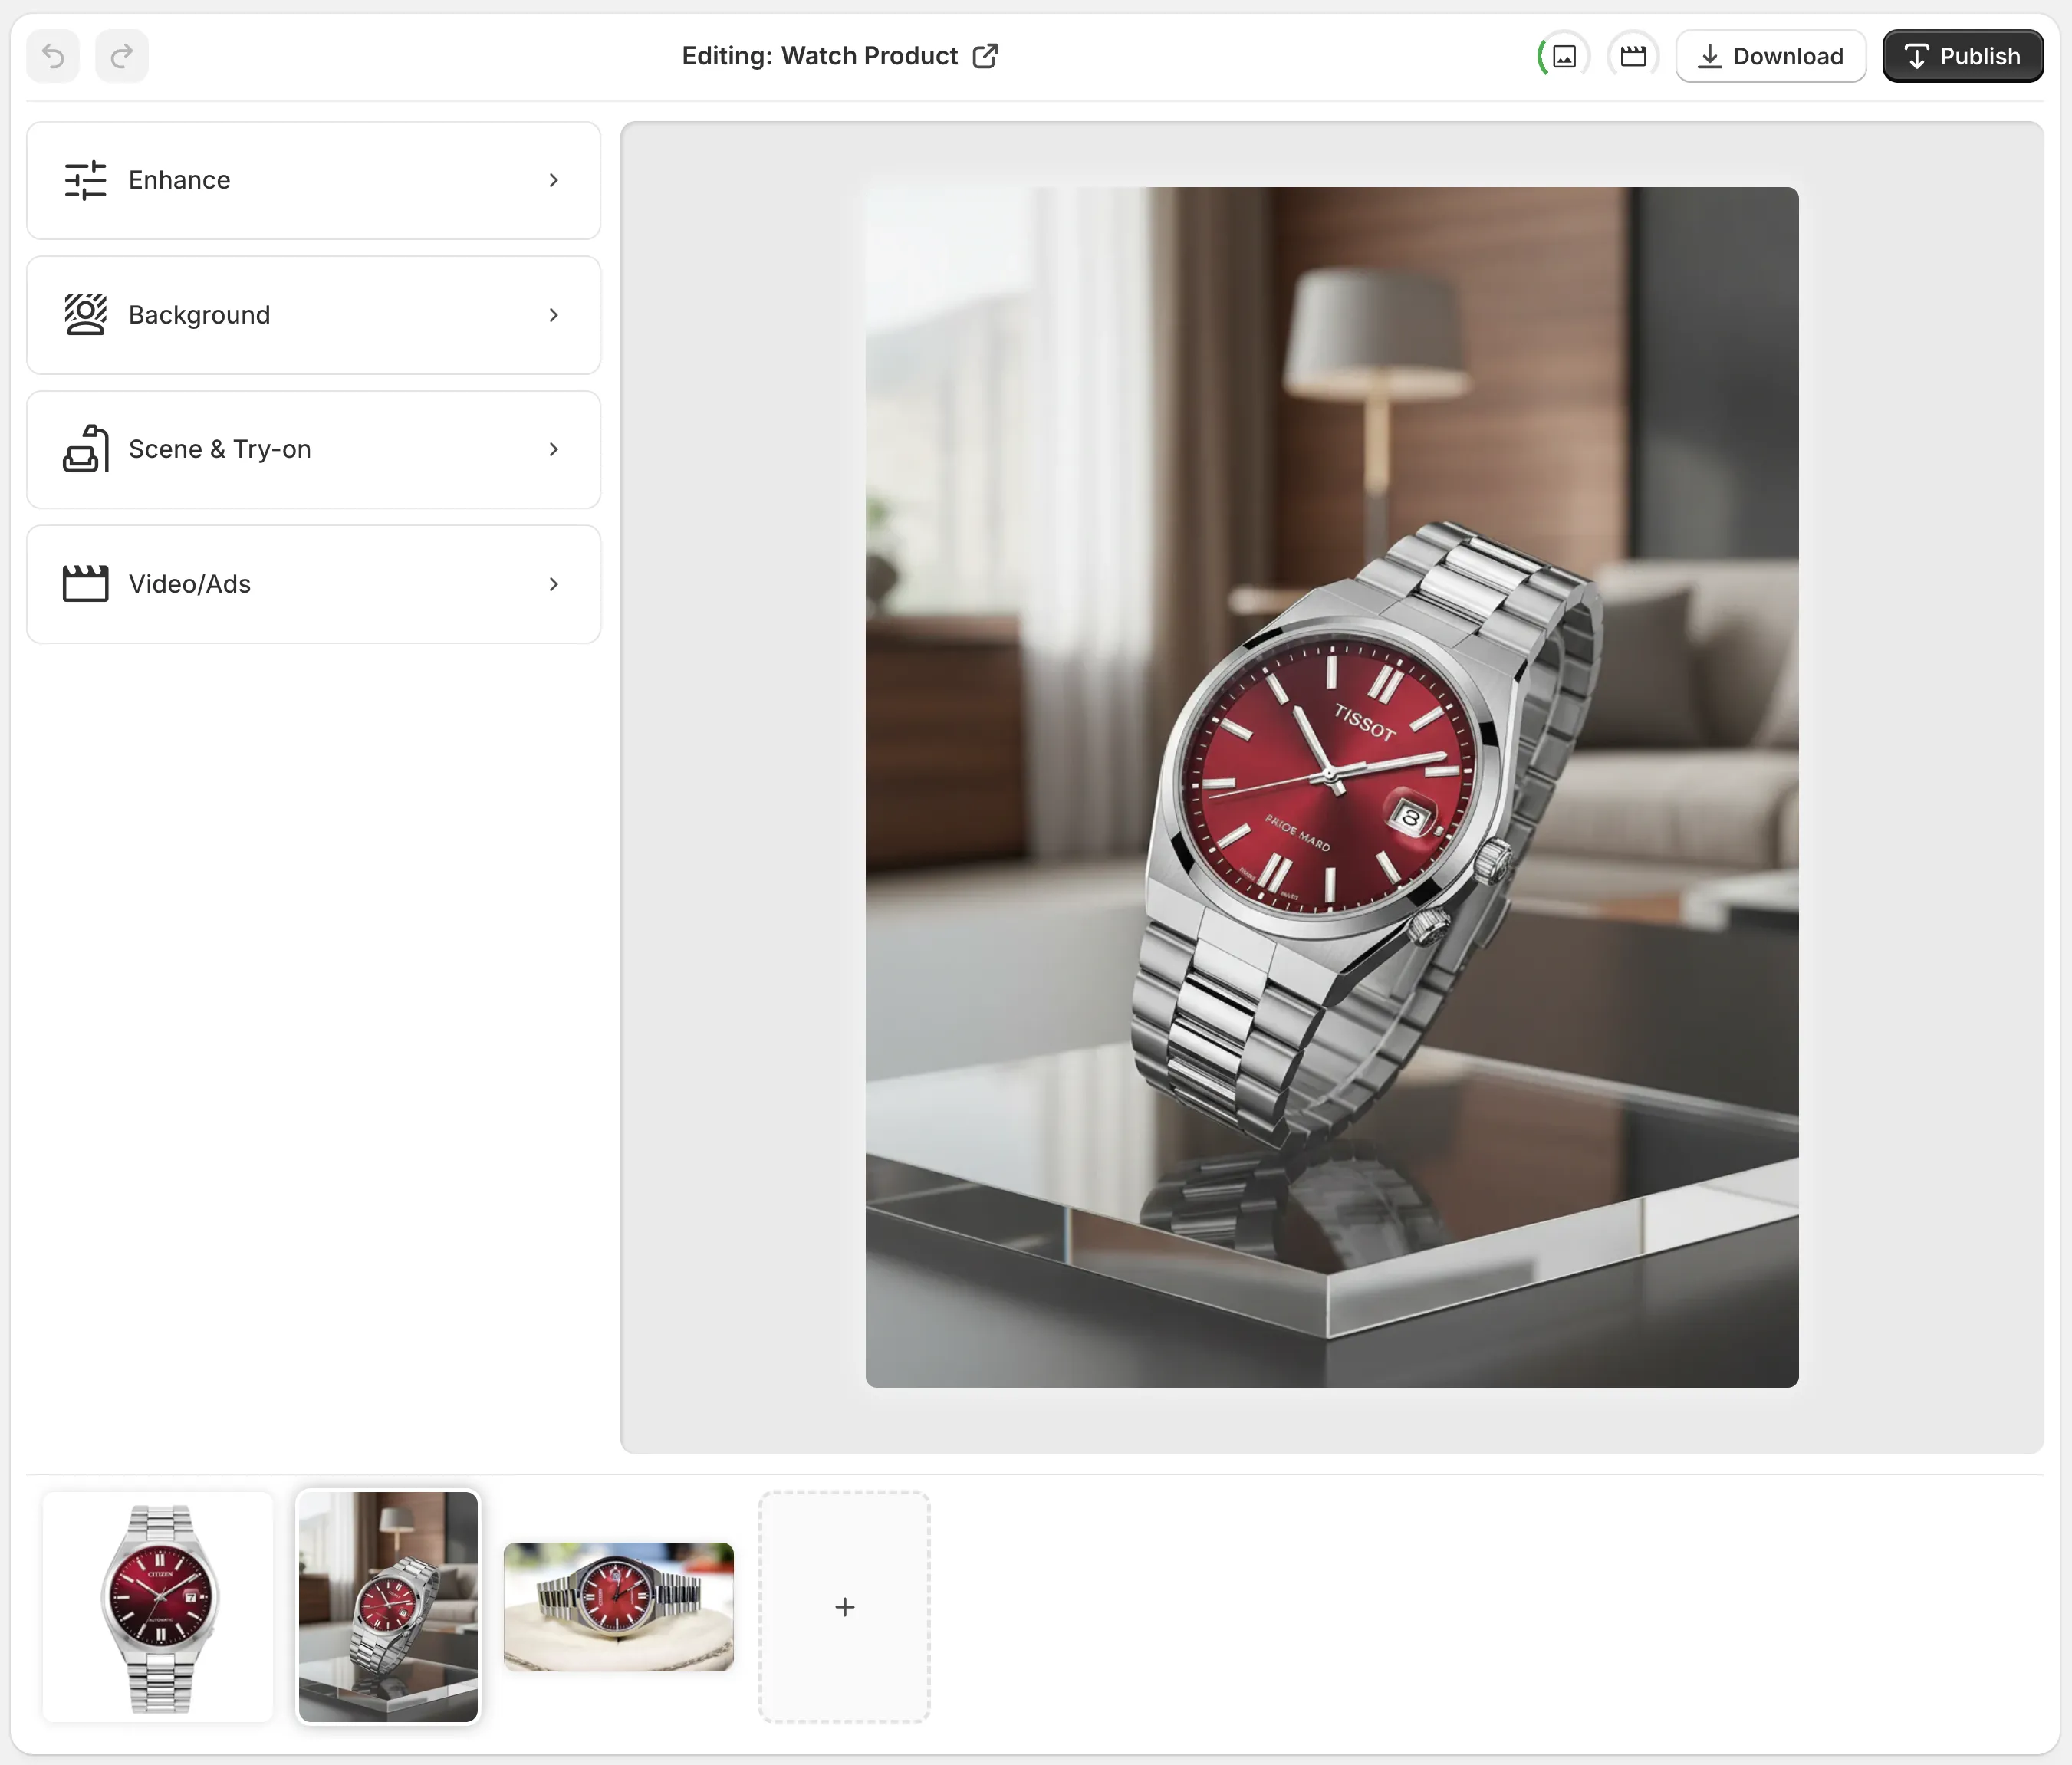
The editor layout is part of the appeal. The tools sit where you expect them, the canvas stays visible, and the image gallery keeps the product context close by. That makes the work feel like a sequence instead of a set of disconnected exports.
Use The Smallest Edit That Solves The Problem
When I am deciding what to do with a source image, I try to move in this order:
- Clean the image first.
- Decide whether the product needs context.
- Add try-on or placement only when it helps the product make sense.
- Save video for the cases where motion actually helps the channel.
That sounds obvious, but it keeps the workflow honest. Not every photo needs a dramatic scene. Sometimes a cleaner background and better lighting are enough. Sometimes you need a lifestyle setting because the product only makes sense when it is placed in the right environment. Sometimes the product needs a model or a try-on treatment because fit or appearance is the real selling point.
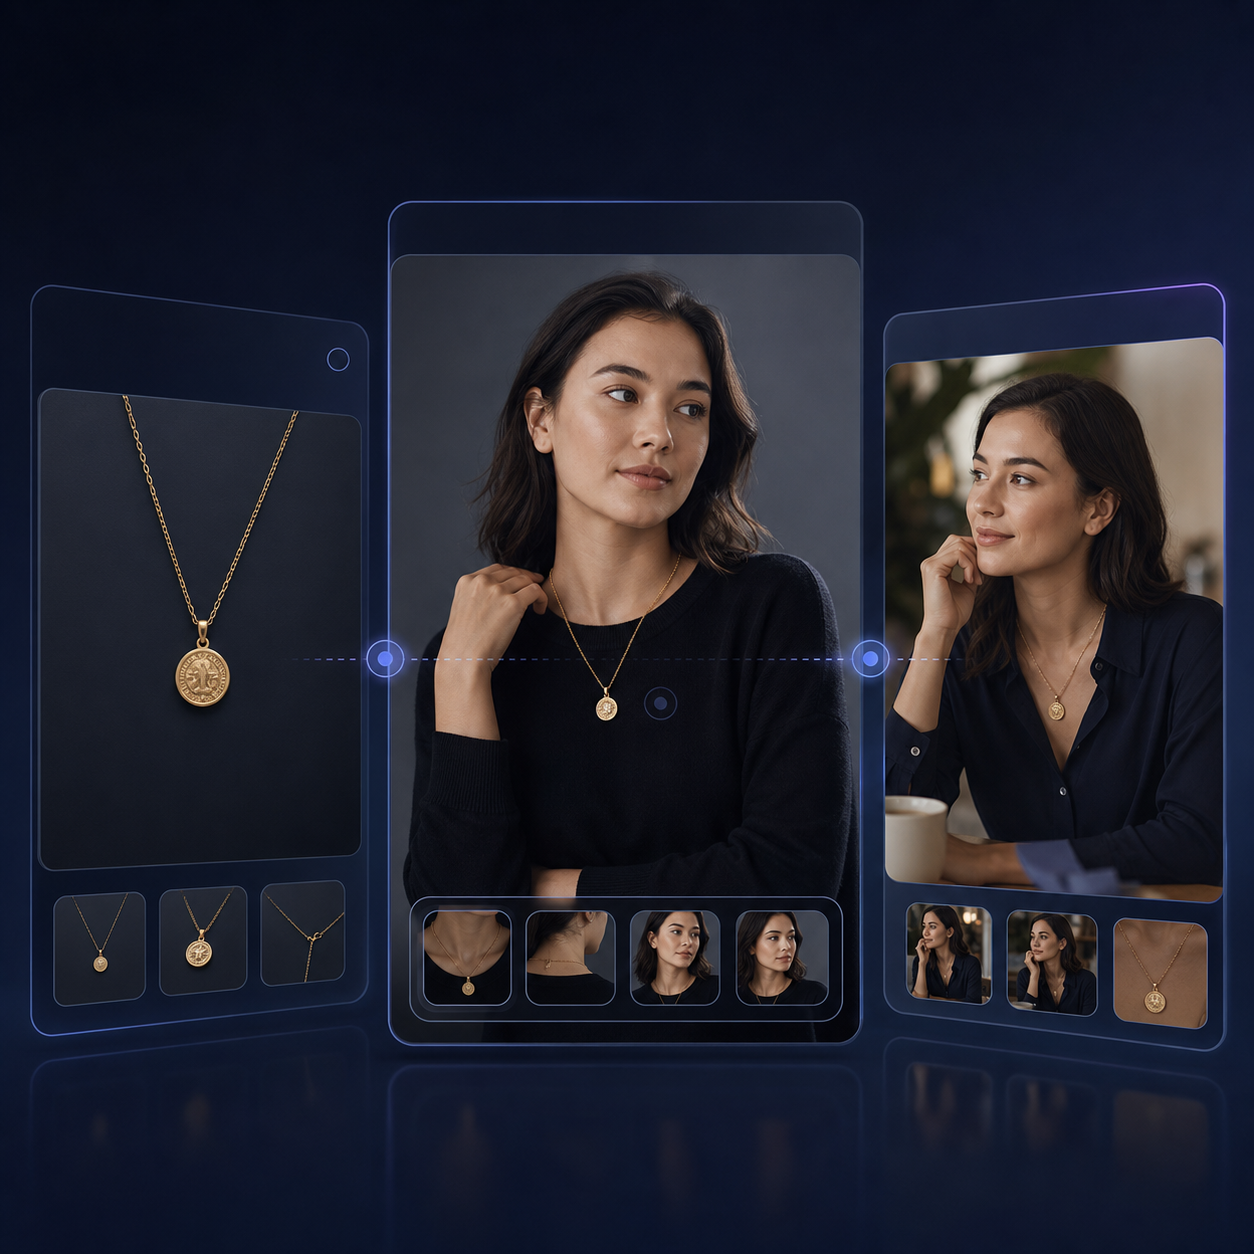
Supra AI Photo Studio is useful because it does not force you into one visual answer. If you are working with fashion or accessories, the try-on path is obvious. If you are working with home goods or decor, object placement is usually the better move. If you only need a cleaner product-page image, the enhancement tools can stop there.
Turn The Same Image Into Multiple Channel Assets
The biggest time saver is not the first edit. It is the second and third asset you get from the same starting photo.
Once the source image is cleaned up, the app can help you create a version for the product page, a version with more lifestyle context, and a version that moves better in paid social or email. The product listing makes that promise explicitly: it includes realistic model try-on, object placement, UGC-style videos, and b-roll videos.

That is the part I would actually test first. A short product video gives you a different kind of asset than a still image, and it is often easier to produce once the source image is already clean and trustworthy.
The point is not to make every image look expensive. The point is to make one image travel further across the parts of the store where it needs to work.
Where This Fits In A Real Shopify Workflow
If I were using Supra AI Photo Studio for a real store, I would start with one product and one source image. I would clean the photo first, then decide whether the product benefits more from a simple enhancement, a lifestyle placement, a try-on version, or a short video.
That approach keeps the process manageable, especially if you are working with a mixed catalog. The app is built for products that need visual variation without a full production cycle, and the free plan makes it easy to test that workflow without committing to a larger rollout.
I would also use it with a clear rule: use the lightest edit that solves the actual problem. If the product is already strong, I would stop after cleanup. If it needs more context, I would move into placement or try-on. If the channel needs motion, I would generate a short video from the same source.
Related Reads
I kept comparing this workflow to a few earlier posts: How to Create Studio-Quality Shopify Product Photos From Plain Shots, How to Create Lifestyle Product Photos for Shopify Without a Shoot, How to Turn Plain Product Photos Into Shopify Marketing Assets, and How I Turned One Product Photo Into a Full Shopify Marketing Kit Without a Shoot.
Those articles all point at the same practical idea: one usable source photo is often enough, as long as the workflow lets you turn it into multiple assets instead of treating the first export as the finish line.
Bottom Line
If your store still relies on one flat product image per SKU, the simplest next step is to test one product through a cleaner workflow. Use the free plan, start with background cleanup or enhancement, then decide whether the product needs a lifestyle placement, a try-on version, or a short video.
That is the most realistic way to use Supra AI Photo Studio: not as a magic button, but as a faster way to get from one decent source photo to a set of assets that can actually do work in the store.

Comments
Post a Comment