How to Sync Notion Content with Webflow CMS Step by Step
Sync Your Notion Content with Webflow CMS: A Comprehensive Step-by-Step Guide
In today's fast-paced digital landscape, efficiency in content management is paramount. If you're an avid user of Notion and Webflow, you know how managing and syncing content between the two can be cumbersome. Enter SyncFlow: the ultimate tool for effortless synchronization between Notion and Webflow. Here's a detailed guide on how to sync your Notion content with Webflow CMS seamlessly.
Why Sync Notion with Webflow?
Content creation is often conducted in Notion, thanks to its robust note-taking and organizational features. However, when it's time to publish to the web, Webflow is a go-to tool for responsive design and visual development. SyncFlow connects these platforms, enabling a smooth transfer of data and enhancing productivity.
Getting Started with SyncFlow
Step 1: Visit SyncFlow Website
Start by visiting SyncFlow's site and click on 'Get Started'. This is your gateway to simplifying your workflow.
Step 2: Grant Access
In order to seamlessly sync your content, you'll need to grant SyncFlow access to both your Webflow and Notion accounts.
Step 3: Account Setup
You'll be prompted to sign up for a new SyncFlow account or log in if you already have one. This is crucial for managing your sync tasks.
Step 4: Connect to Webflow
Open your Webflow Designer and launch the SyncFlow app. This establishes the initial connection needed for synchronization.
Mapping and Syncing Process
Step 5: Connect to Notion
Within the SyncFlow app, click ‘Connect Notion’. You'll select the specific Notion page or folder for syncing purposes.
Step 6: Create a Sync Task
Initiate a new sync task by selecting 'Sync a new database'. This aligns your Notion content with its Webflow counterpart.
![AIIMAGE: A step-by-step digital illustration of hands using both Notion and Webflow on separate devices, showcasing their interconnectivity with arrows and digital data streams.]()
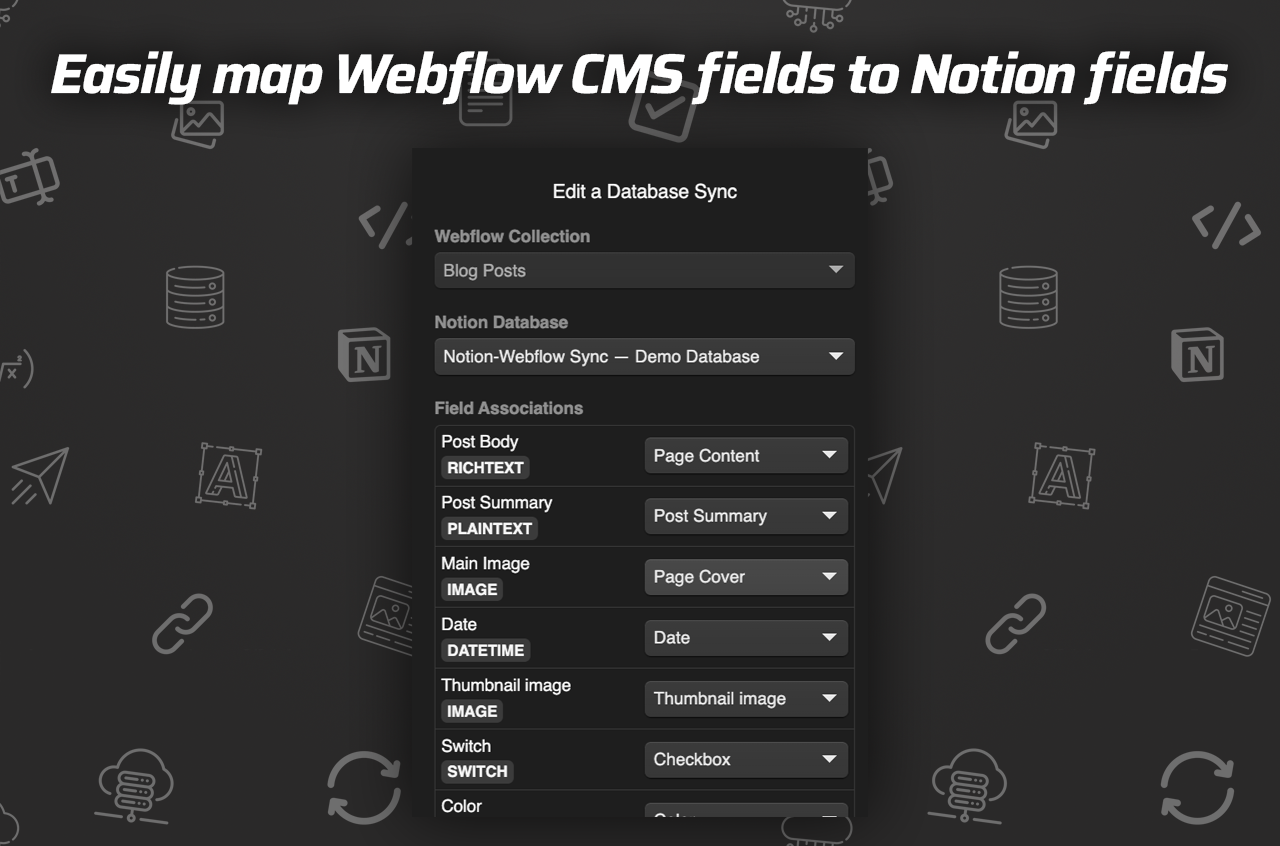
Step 7: Select Webflow Collection
Choose the Webflow collection that you want to sync with your Notion database. This step is vital for content alignment.
Step 8: Set Up Notion Database
Pick an existing Notion database or create a fresh one. If creating new, SyncFlow will set up the fields for you, saving valuable time.
Configuring Sync Settings
Step 9: Adjust Settings
Tweaking settings such as 'Auto-Publish', 'Auto-Sync', code block highlights, and math expression rendering ensures a tailored user experience.
Step 10: Styling Options
Choose 'Inline Styles' for direct styling or 'Use Classes' for more customization within Webflow. Tailor the styling to your aesthetic needs.
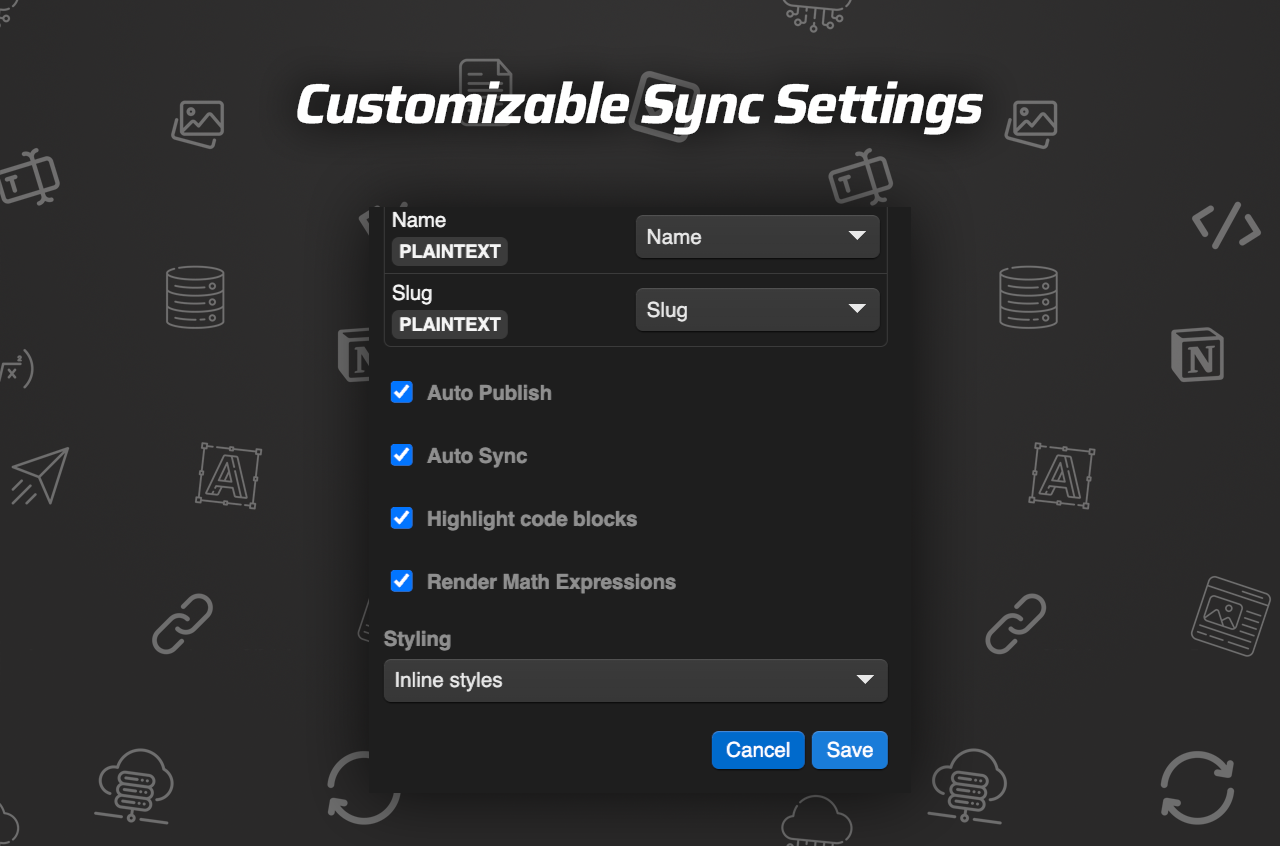
Step 11: Save Settings
Finalizing these settings solidifies your synchronization process.
Finalizing and Verifying Sync
Step 12: Verify Sync
Input a new entry in Notion to check its status within your Webflow collection. The effectiveness of SyncFlow is on display here.
Step 13: Check Webflow CMS
After a brief wait, you will see the synchronized text within your Webflow CMS collection. It's that simple!
Optional: Full-Resync
For existing databases, a full-resync ensures comprehensive synchronization between your Webflow and Notion databases.
Experience Efficiency with SyncFlow
SyncFlow is not just a tool—it’s a game-changer for content managers and creators alike. It bridges the gap between creation and publication effortlessly, ensuring your content is always up to date.
For more insights, check out the SyncFlow Demo to see this powerful integration in action.
Boost your productivity, streamline your processes, and take your content management strategy to the next level with SyncFlow.


Comments
Post a Comment