How to Seamlessly Transfer Notion Content to Webflow CMS
Introduction
If you're a digital content creator or a business aiming to streamline your content management process, integrating Notion with Webflow using SyncFlow is a game-changer. This tool not only simplifies but enhances how your content transitions from ideation in Notion to publication on your Webflow site.
In this guide, we'll walk you through how to effectively use SyncFlow to transfer your Notion content to Webflow CMS with ease and efficiency.
Why Use SyncFlow?
SyncFlow is more than just a syncing tool; it revolutionizes your content workflow by:
- Automating Content Updates: With auto-sync features, any changes in your Notion database are instantly reflected in your Webflow CMS. This ensures up-to-date information is always at your fingertips.
- Supporting Versatile Content Styles: Import Notion's unique elements with inline styling directly or use classes in Webflow for more design control.
- Time Efficiency: Reduces manual work, freeing up more time to create engaging content.
Visit SyncFlow for a comprehensive overview of all features and benefits.
Getting Started with SyncFlow
1. Install SyncFlow
Step 1: Visit the SyncFlow website and click 'Get Started'.
Step 2: Connect your Notion and Webflow accounts to allow data access.
2. Setup and Configuration
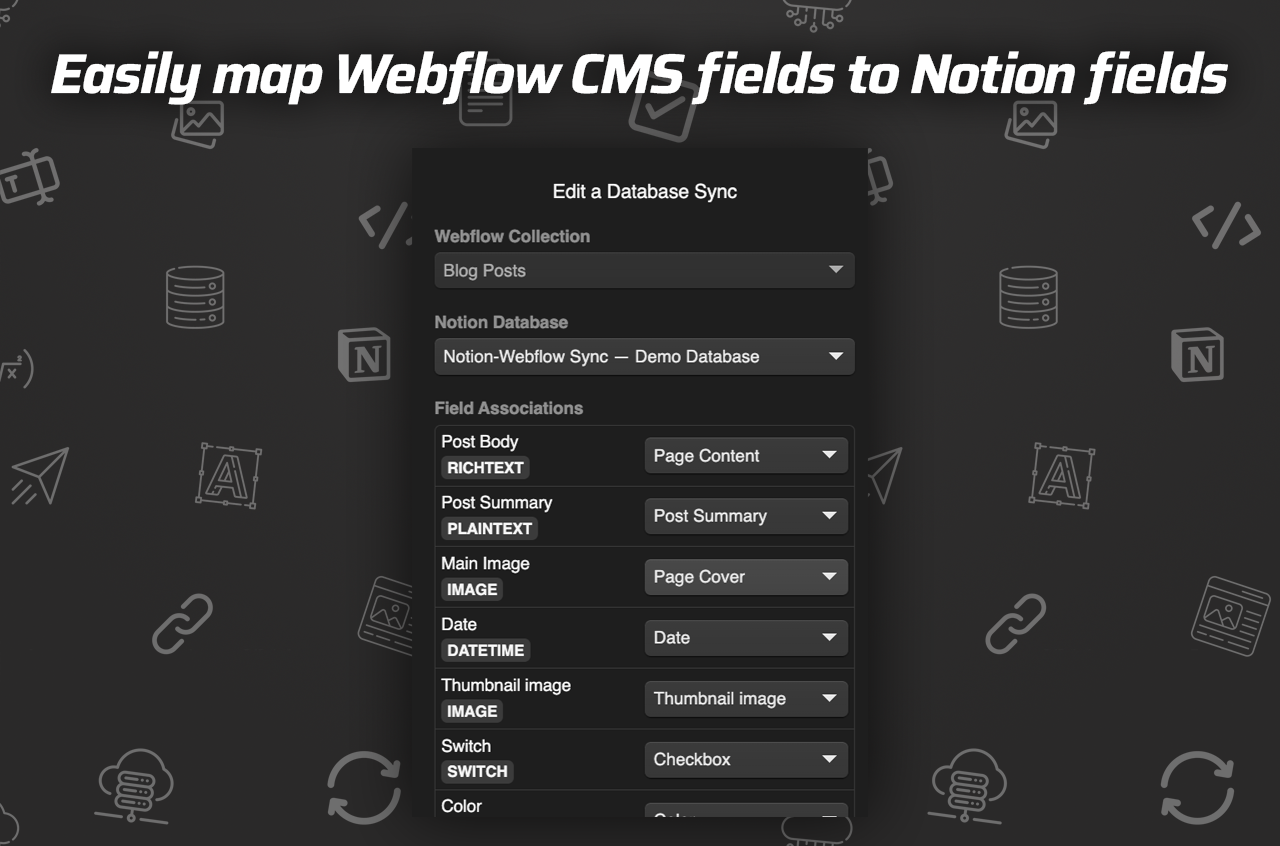
Step 1: Map the Fields: Match fields from your Webflow CMS collection with Notion database fields using the point-and-click interface. This process is intuitive and straightforward.
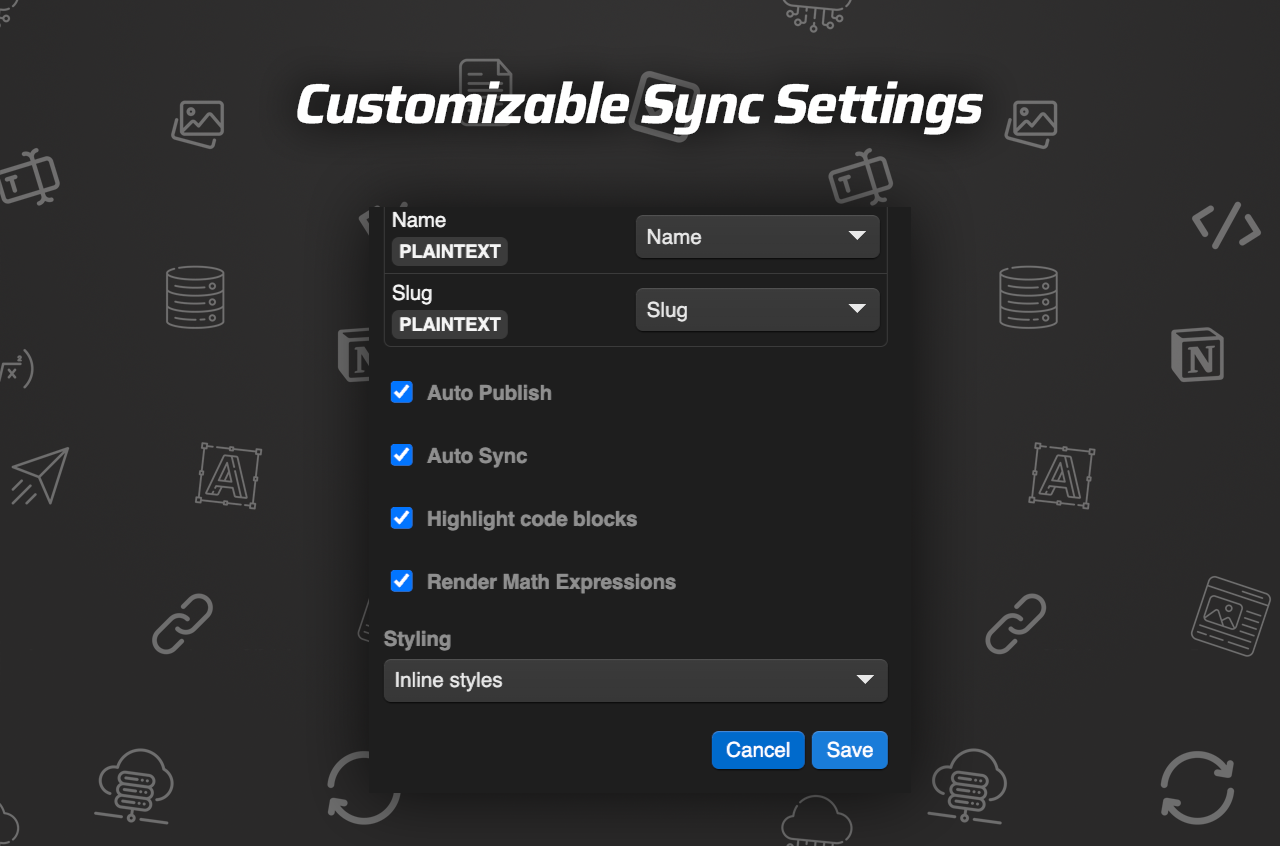
Step 2: Adjust Sync Settings: Here, you can configure your auto-publish settings, personalize inline styles, and select specific Webflow collections.
Map Fields Efficiently:
- Use the visual interface to connect text, images, dates, and more between platforms.
3. Sync and Customize
Step 1: Once your mapping is complete, choose between automatic syncing or manual synchronization fo your content publishing schedule.
Step 2: Customize the way your data is styled: select whether you want inline styles or to utilize classes for deeper design customization.

4. Verify Your Sync
For assurance that your sync is successful, add entries into your Notion database and verify in your Webflow CMS. This ensures each data field is correctly integrated and ready for live publication.
5. Continuous Optimization
SyncFlow offers a Full Resync option, allowing you to overhaul your existing databases to make sure they are 100% aligned, further proving its utility in maintaining data coherence over time.
Conclusion
By incorporating SyncFlow into your content management mix, you make syncing between Notion and Webflow as effortless as possible. The tool maximizes efficiency, minimizes manual effort, and upkeeps content integrity brilliantly, making it an essential asset for creators and businesses alike.
For pricing details and to dive deeper into SyncFlow's features, make sure to explore their pricing plan section.
With this seamless transfer process, you can focus on what matters most: crafting compelling content that speaks to your audience.


Comments
Post a Comment