How to Publish Notion Posts Directly to Webflow CMS Effortlessly
Introduction
In the ever-evolving landscape of digital content creation, efficiency and integration are paramount. If you're utilizing Notion for your content planning and Webflow for showcasing your creative work, an optimized workflow is crucial. This guide takes you through an effortless process to publish your Notion posts directly to Webflow CMS using SyncFlow, a tool designed to streamline syncing and publishing between these two powerful platforms.
The Benefits of Syncing Notion with Webflow
Enhanced Productivity
By directly syncing Notion with Webflow, content creators can maintain focus on what truly matters – creating and designing beautiful web experiences. With SyncFlow, say goodbye to the tedious task of manually transferring content from Notion to Webflow.
Seamless Content Management
The utilization of SyncFlow ensures that content is constantly updated and in sync between Notion and Webflow. This gives you the advantage of real-time updates and error-free content migration, boosting both productivity and consistency.
How to Sync Notion Pages with Webflow CMS
Step 1: Visit SyncFlow
Begin by visiting SyncFlow's website and click on 'Get Started'. This is your first step towards an efficient Notion to Webflow integration journey.
Step 2: Grant Necessary Access
You'll need to approve and grant SyncFlow access to your Webflow sites. Once done, either sign up for a new account or log in if you are an existing user.
Step 3: Establish Connections
- Connect to Webflow: Launch the SyncFlow app within the Webflow designer to start the process.
- Connect to Notion: Once inside the app, click on 'Connect Notion' and choose the specific Notion page or folder for synchronization.
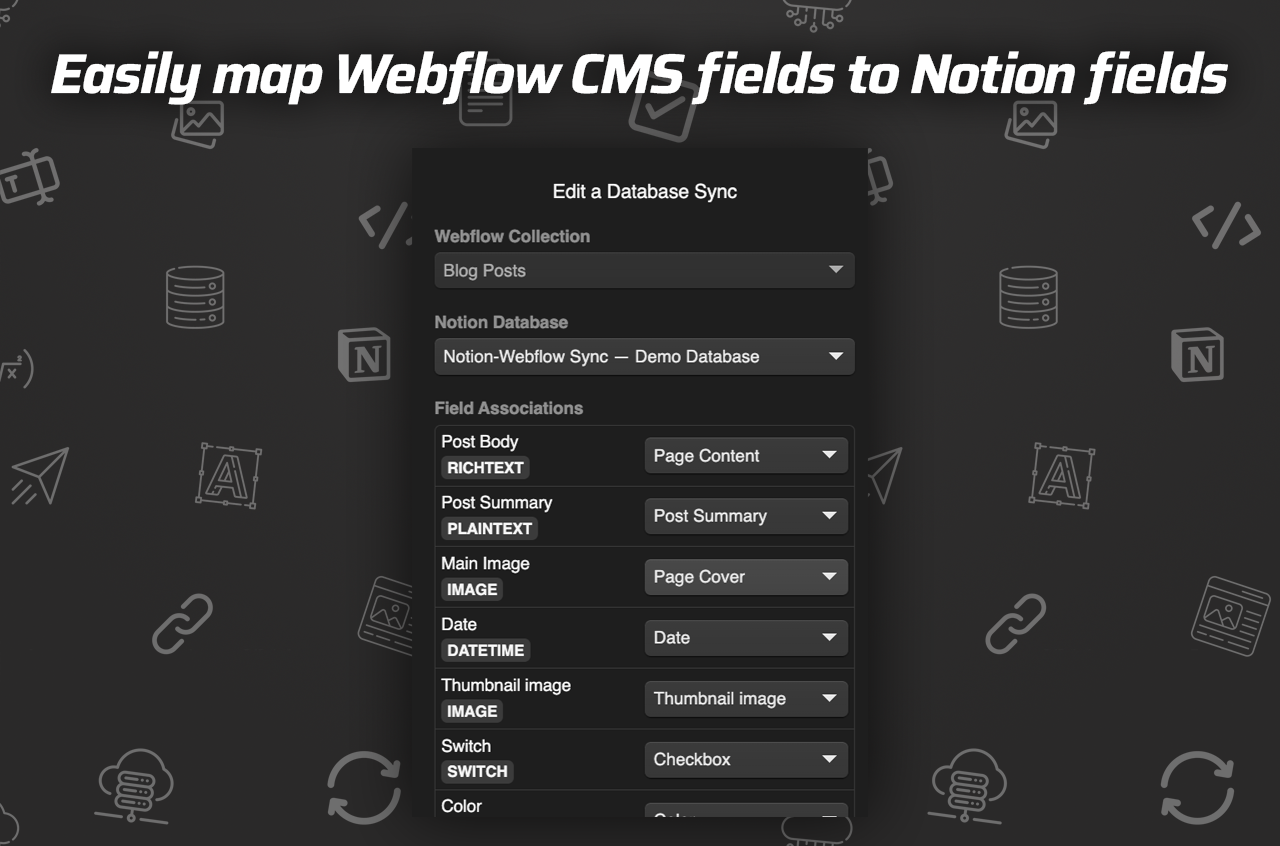
Step 4: Create Your Sync Task
- Select Files: Click on 'Sync a new database' in SyncFlow.
- Choose Webflow Collection: Pick the Webflow collection that you wish to sync with your Notion database.
- Set Up Notion Database: If you haven't already, select an existing Notion database or a new one will be created by SyncFlow, with the correct fields.
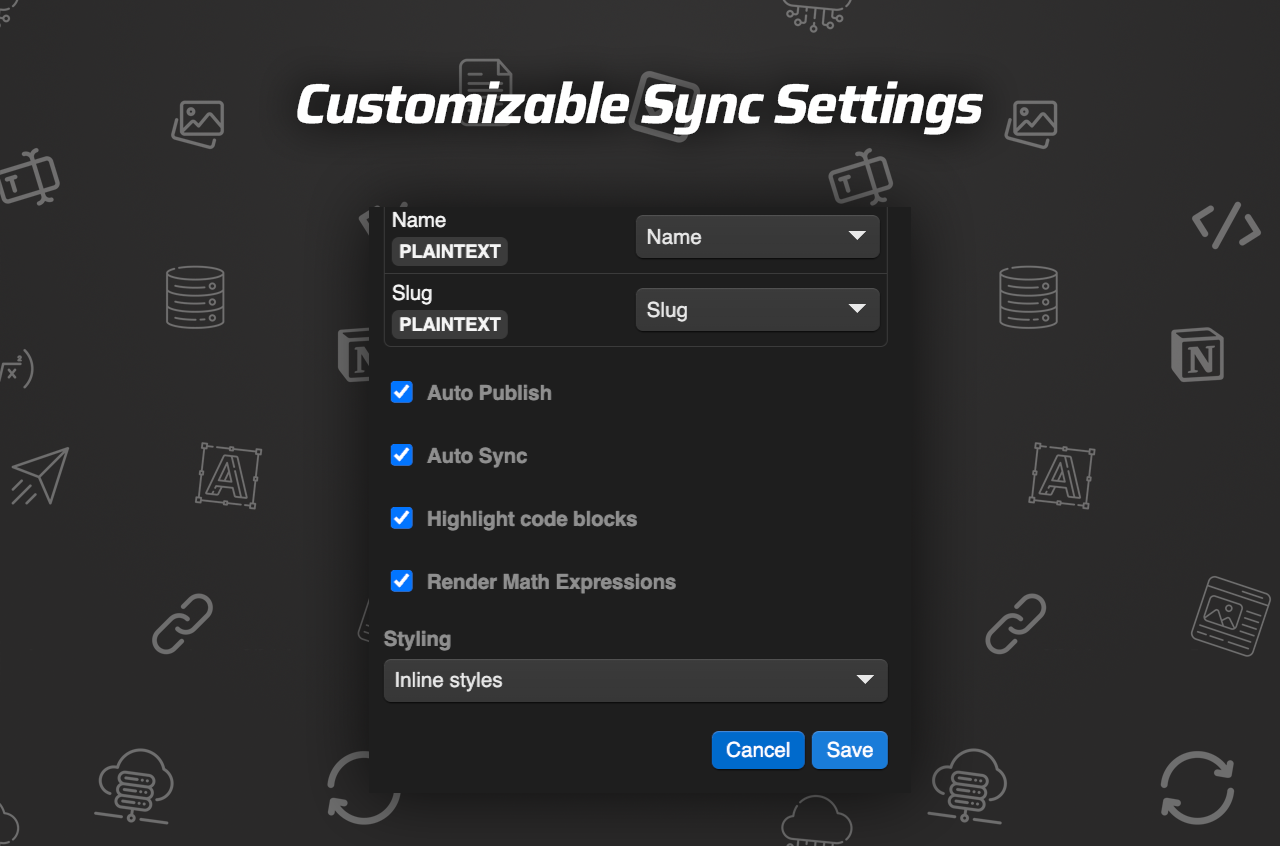
Step 5: Configure Sync Settings
Adjust settings like 'Auto-Publish', 'Auto-Sync', code block highlights, and TeX support. Choose between 'Inline Styles' for direct styling or 'Use Classes' for Webflow customization.
Step 6: Save Settings and Verify
Save your SyncFlow settings to establish synchronization. Test this by adding a new entry in Notion and checking its sync status in the Webflow collection. Use the full-resync option if required.
Video Tutorials for Assistance
- Check out this full tutorial video on YouTube to walk you through each step.
Advantages of Using SyncFlow
- Auto-Sync: Enable automatic sync so that any Notion page created or modified gets instantly reflected in Webflow.
- Versatile Field Types: Perfectly handle various field types ensuring flexibility in content management.

By enabling auto-sync, versatile field types, and full customization of styling, SyncFlow equips your content strategy with the depth and flexibility it deserves.
Conclusion
Syncing Notion with Webflow via SyncFlow revolutionizes the way creators manage and publish content. Seamlessly integrate your writing with stylized designs in Webflow, automate synchronization tasks, and empower your content creation process. Start your journey today, optimize your workflow, and let your creativity flourish without hindrance.
Happy creating!


Comments
Post a Comment