How To Create High-Converting Shopify Product Images On A Budget
If your Shopify product images look dull, inconsistent, or lack lifestyle context, you are leaving revenue on the table. The good news: you do not need an expensive studio or a big team to create high-converting product photos. With a smart workflow and AI-powered tools, you can transform plain shots into scroll-stopping visuals on a budget.
Install Supra AI Photo Studio on the Shopify App Store to follow along. You can start free and scale as you grow.
Why high-converting Shopify product images matter
- First impression power: Product visuals are often the first touchpoint. Sharp, consistent imagery increases trust and reduces bounce.
- Conversion lift: Clear photos, lifestyle context, and accurate color can boost add-to-cart and reduce returns.
- Ad performance: Better visuals win the auction with higher CTRs and lower CPAs.
What makes a product image convert
- Clarity and accuracy: Crisp focus, true-to-life color, no distractions.
- Consistency: Matching angles, lighting, and backgrounds across variants.
- Context: Lifestyle scenes that show size, use, and vibe.
- Speed: Fast-loading, properly compressed images with descriptive alt text.
The budget-friendly workflow (step-by-step) Use this repeatable process with Supra AI Photo Studio to create professional photos quickly.
1) Audit your current images
- List your must-have angles per product category (front, 45°, detail, scale-in-hand, lifestyle).
- Note issues: mixed backgrounds, low resolution, harsh shadows, color shifts.
- Define a simple style guide: backdrop color family, light softness, preferred camera angle, lifestyle mood.
2) Isolate and clean the product
- Use Isolate Product to remove the background and distractions.
- Apply Auto Enhance to denoise, deblur, and balance exposure and white balance.
- Upscale to recover detail so your zoomed images stay crisp.
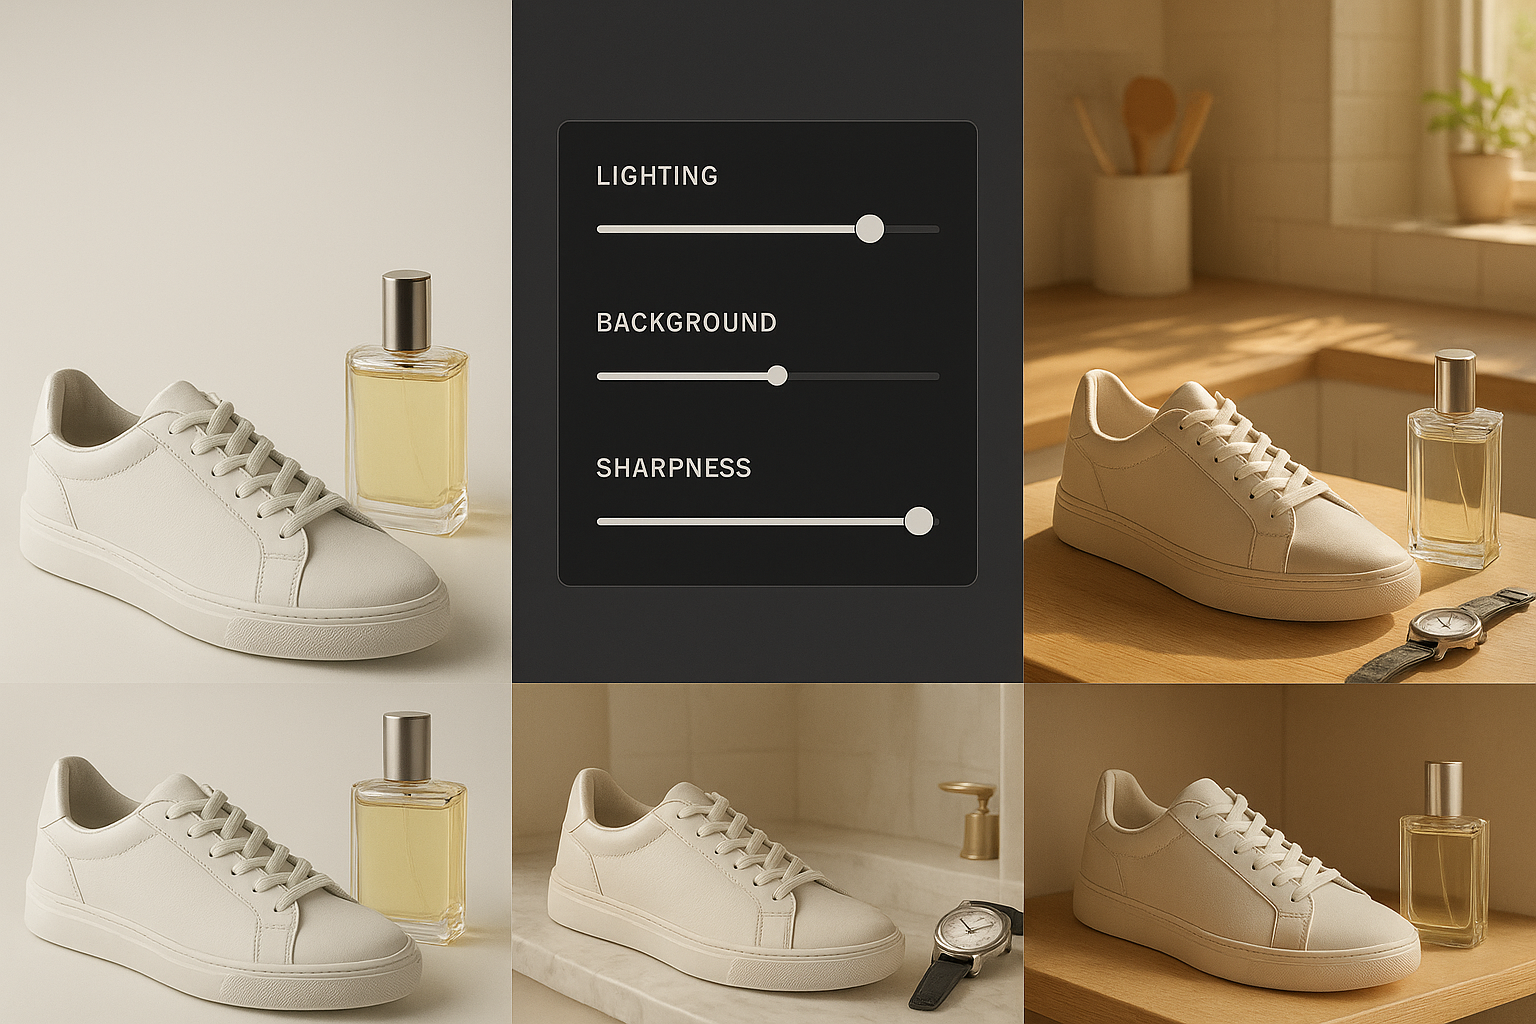
3) Create lifestyle context in minutes
- Use Object Placement to drop your product into relevant settings: studio table, boutique shelf, bathroom vanity, outdoor picnic, or office desk.
- Choose lighting style (soft daylight, moody studio, golden hour), surface type (marble, wood, linen), and camera angle to match your brand.
- Tip: Keep the product the hero. Add subtle shadows and reflections to ground it in reality.

4) Fashion? Generate on-model images without a shoot
- Use AI Try-On to place apparel, jewelry, and accessories on realistic models.
- Customize model pose, skin tone, and body type while preserving product accuracy.
- Produce diverse, inclusive imagery at scale without booking talent.

5) Produce short videos for ads and PDPs
- Generate UGC-style clips to simulate influencer reviews and use-cases.
- Add B-roll with cinematic product drops, liquid or dust effects, and slow motion that preserves product detail.
- Use these for PDP galleries, TikTok, Reels, and retargeting ads.
6) Export for speed and SEO
- Use consistent aspect ratios (e.g., 1:1 or 4:5 for grids, 3:2 for hero banners).
- Compress intelligently to balance speed and quality; keep key images at higher resolution for zoom.
- Write descriptive alt text using natural language and target keywords (example: eco-friendly bamboo water bottle on marble counter, 24 oz, matte finish).
7) Publish and A/B test
- Test primary product image variations: pure studio vs lifestyle, top-down vs 45°, dark vs light background.
- Track metrics: CTR from collection to PDP, add-to-cart rate, conversion rate, and returns.
Inside the editor: a quick tour
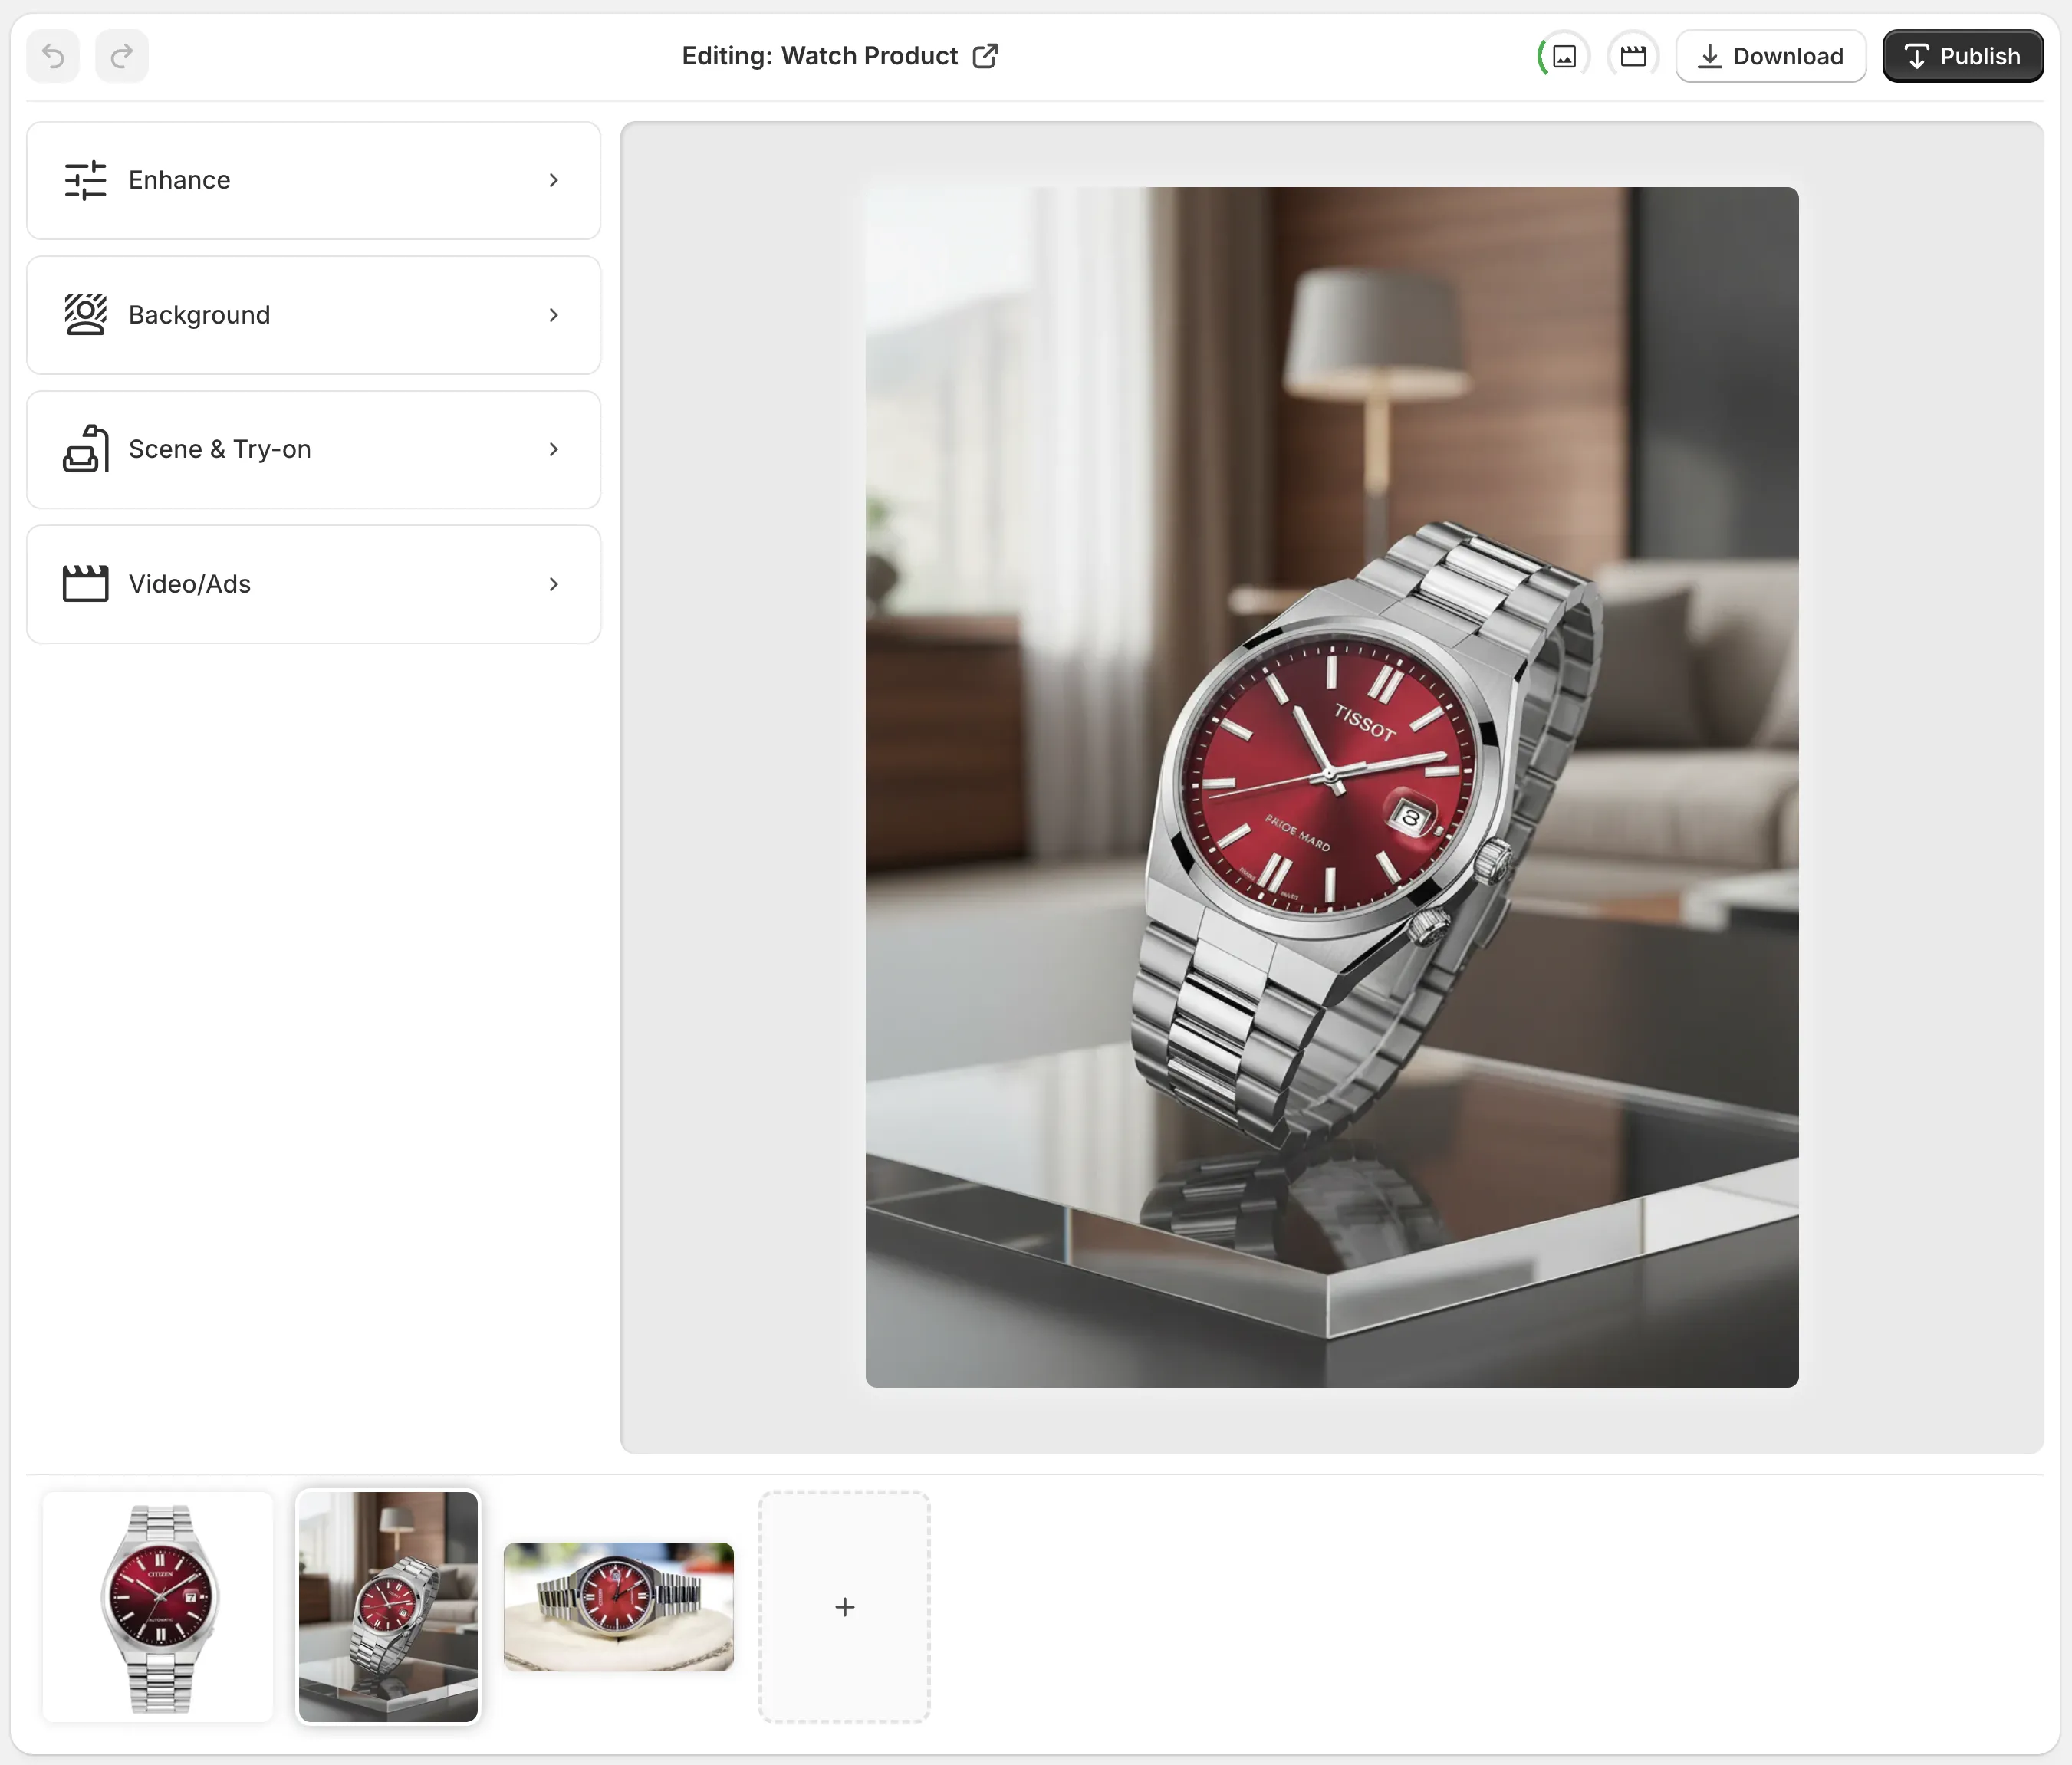
- Top bar: Undo or redo, switch product, download, or publish changes.
- Tools: Background removal, upscaling, auto enhance, virtual try-on, object placement.
- Canvas: Zoom and pan to check edge quality, shadows, and texture fidelity.
- Gallery: Keep multiple angles and versions organized per product.
Best practices for high-converting Shopify product images
- Lead with clarity: Your first image should be obstruction-free and perfectly lit.
- Add lifestyle depth on image 2–4: Demonstrate scale, use, and mood.
- Show details: Macro shots for textures, stitching, materials, ports.
- Keep consistency: Same horizon line, lens look, and lighting across a category.
- Accessibility and SEO: Alt text that describes the scene and the product; do not keyword-stuff.
- Mobile first: Verify crops and legibility on smaller screens.
Common mistakes to avoid
- Busy backgrounds that compete with the product.
- Over-saturation or filters that shift true color.
- Inconsistent shadows that make composites feel fake.
- Huge file sizes that slow down page speed.
Budget math: why this saves money
- Traditional shoots add up quickly: studio, props, talent, retouching, reshoots.
- With Supra AI Photo Studio, you can start on the Free plan to test core features, then upgrade only when needed.
- Free: 4 AI image generations per month to try the workflow.
- Standard: 60 images per month for small catalogs.
- Professional: 300 images and 5 videos per month for scaling stores.
- Agency: 1000 images and 20 videos per month for large teams.
- You also fully own the images and videos you generate.
Quick checklist before you publish
- Primary image: clean, bright, true-to-color, centered.
- Gallery: studio, lifestyle, scale-in-context, and 1–2 detail macros.
- File: compressed appropriately and named descriptively (category-product-key-attributes).
- Alt text: descriptive and human-readable.
- Consistency: angles and lighting align with your style guide.
Watch a quick demo Get a feel for the workflow and results: Supra AI Photo Studio Demo
Action plan you can run today 1) Pick 3 underperforming SKUs and import their current images. 2) Isolate, enhance, and upscale in minutes. 3) Generate 1 studio hero image + 2 lifestyle contexts per SKU. 4) Add one macro detail shot per SKU for texture. 5) Publish, write alt text, and run an A/B test for the primary image.
Ready to turn plain photos into high-converting visuals on a budget?
- Install the app: Supra AI Photo Studio on the Shopify App Store
- Explore features and tips: Supra AI Photo Studio landing page
With the right process and the right tool, your product photography stops being a bottleneck and becomes a competitive advantage that drives conversions, lowers costs, and scales with your catalog.


Comments
Post a Comment