How to Build a No-Shoot Product Photo Workflow for Shopify
If your Shopify product pages still rely on one plain studio shot, the problem is usually the workflow, not the camera. You need one repeatable path from raw image to clean product photo, then to lifestyle context, then to ad-ready motion.
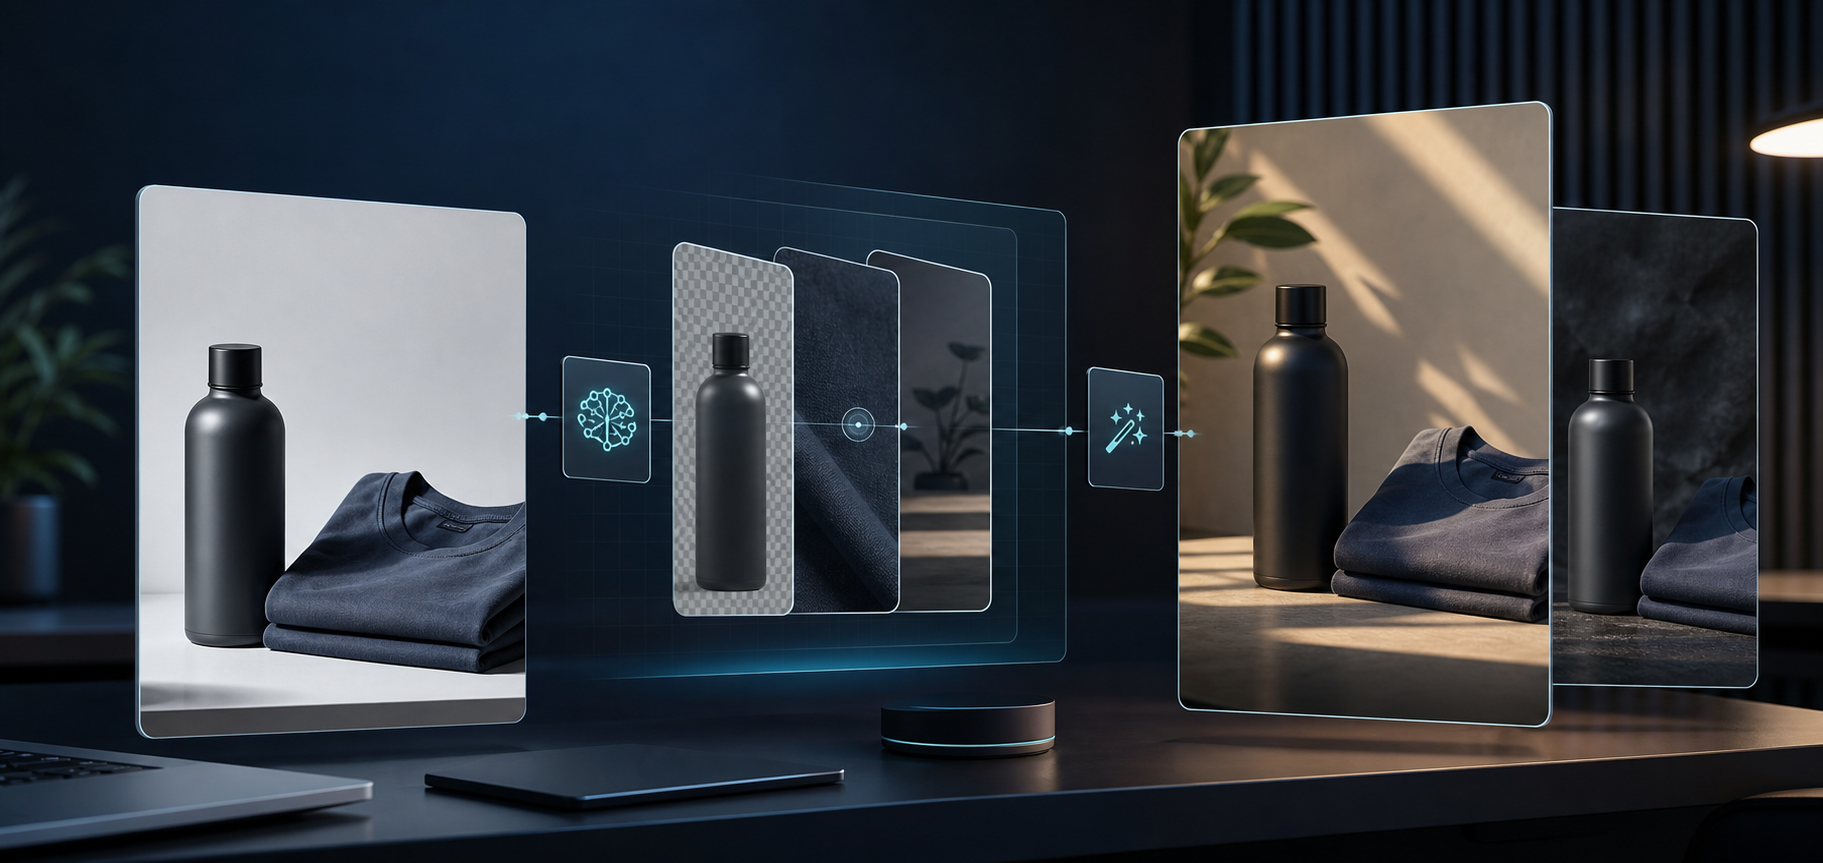
Supra AI Photo Studio is built for that. It lets you remove or replace backgrounds, upscale weaker files, auto-enhance lighting and color, place products into new scenes, build AI model try-ons, and generate UGC videos or b-roll from the same starting image.
Why a no-shoot workflow works
A lot of stores try to solve every visual problem with a better hero photo. That is expensive and slow. A better approach is to treat product photography like a system:
- Clean the source file.
- Decide what the image needs to do.
- Create the right output for that job.
- Reuse the same asset across product pages, ads, and social.
That keeps the work focused on conversion, not just aesthetics.
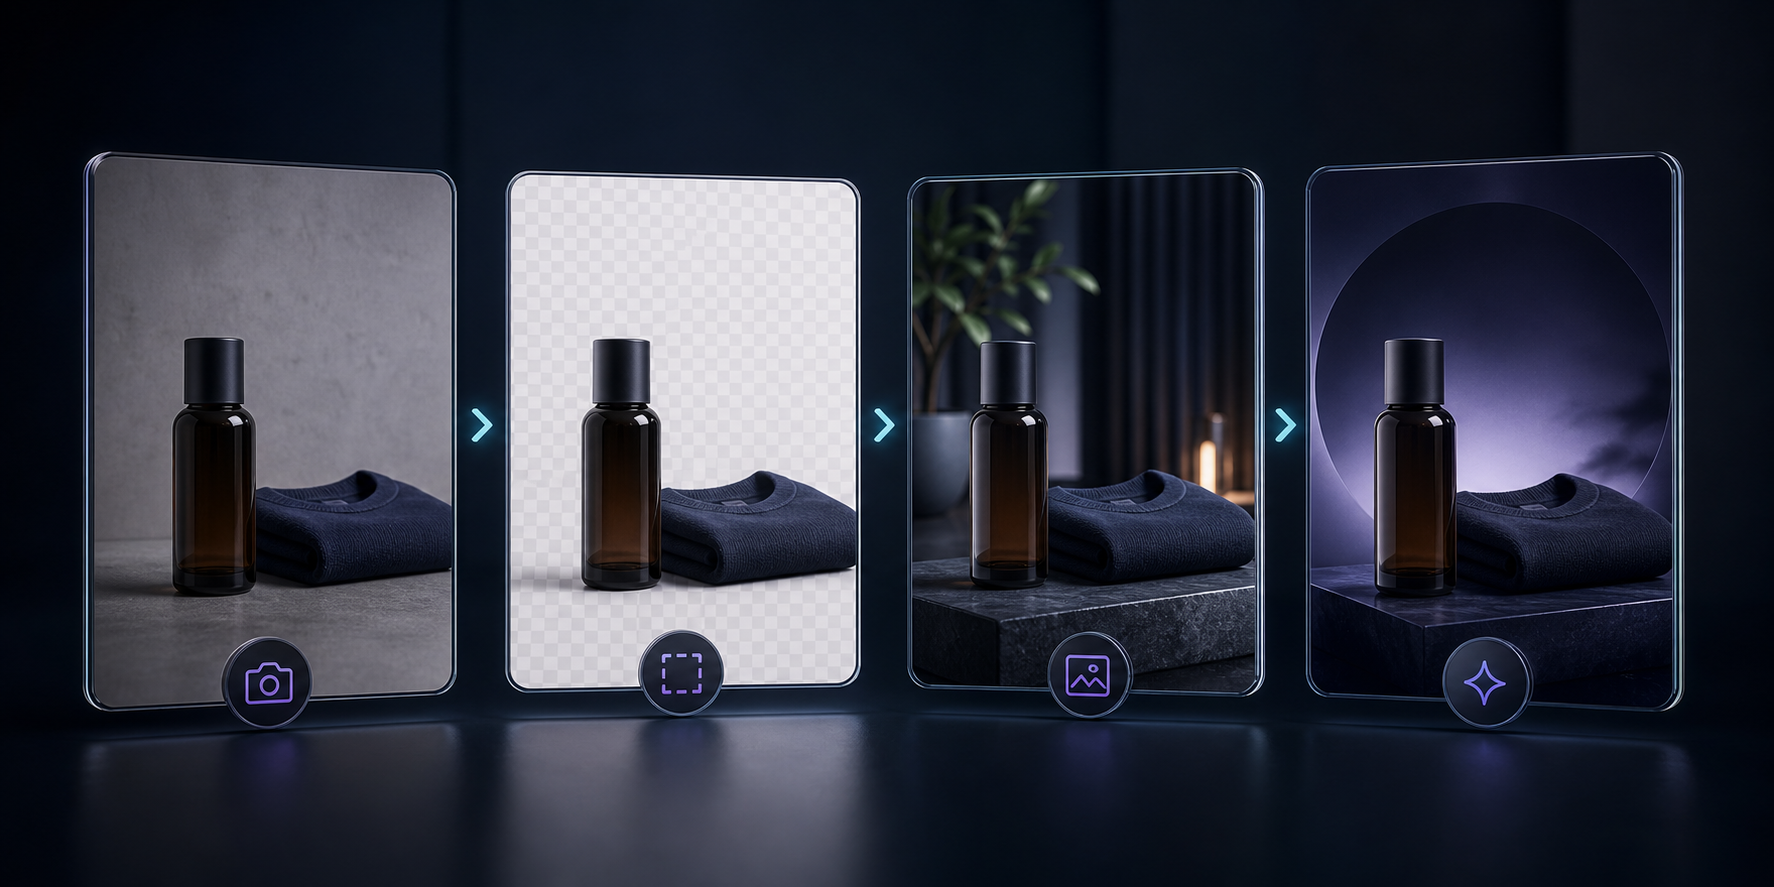
Step 1: Clean the source before you style it
Start with the image that is already closest to usable. If the background is distracting, remove it. If the photo is soft, upscale it. If the lighting is muddy, auto-enhance it. Those fixes are usually faster than jumping straight into a full scene change.
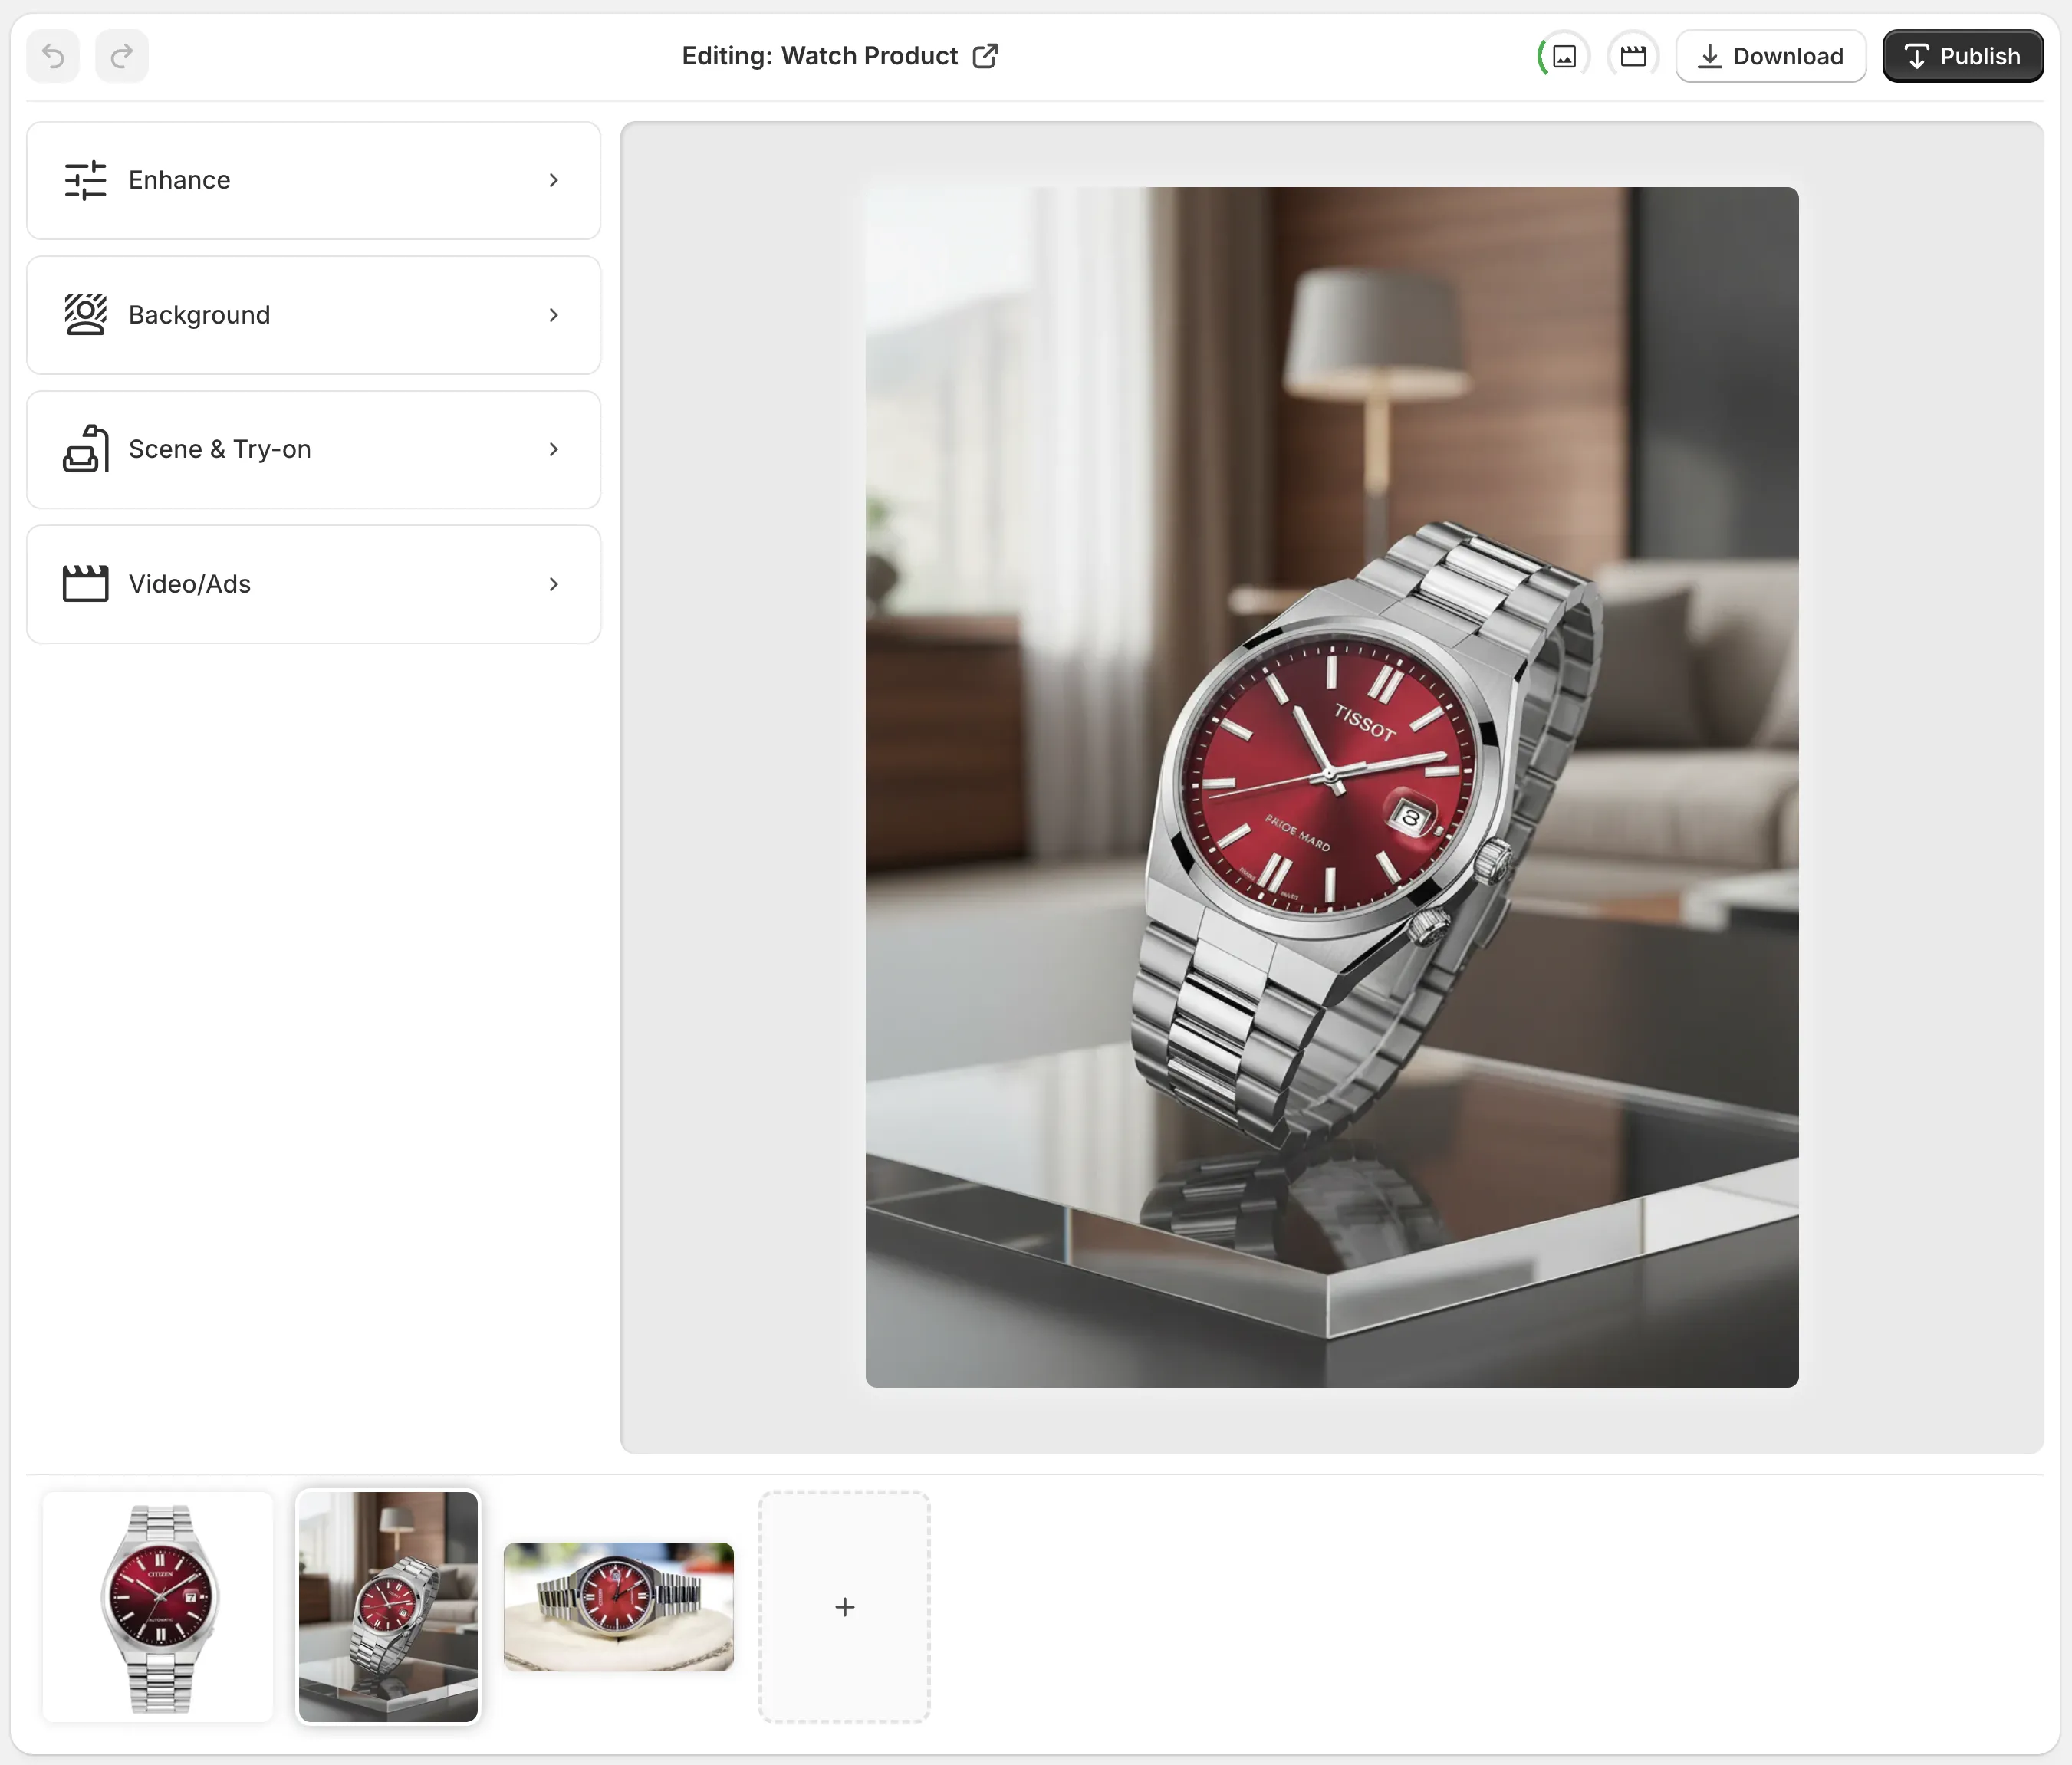
The app's editor keeps that process organized: tools on the left, canvas on the right, and the image gallery at the bottom. That matters because you want cleanup, placement, and export in one place, not scattered across separate tools.
When I think about the first pass, I usually ask three questions:
- Is the product already centered and readable?
- Is the issue background clutter, sharpness, or color?
- Do I need a better version of this same shot, or a different kind of shot entirely?
If the answer is “same shot, better quality,” use the enhancement tools first. If the answer is “different shot,” move to scene generation.
If the pain point is catalog-wide consistency rather than one bad image, pair this workflow with How to Keep Shopify Product Photos Consistent Across Your Catalog. It is the same problem at a larger scale.
Step 2: Match the output to the job
Not every product needs the same treatment. Supra AI Photo Studio is most useful when you choose the feature based on the output you actually need.
| Goal | Best feature | Why it helps |
|---|---|---|
| Clear product detail | Background remover, upscaling, auto enhance | Keeps the item readable on the page |
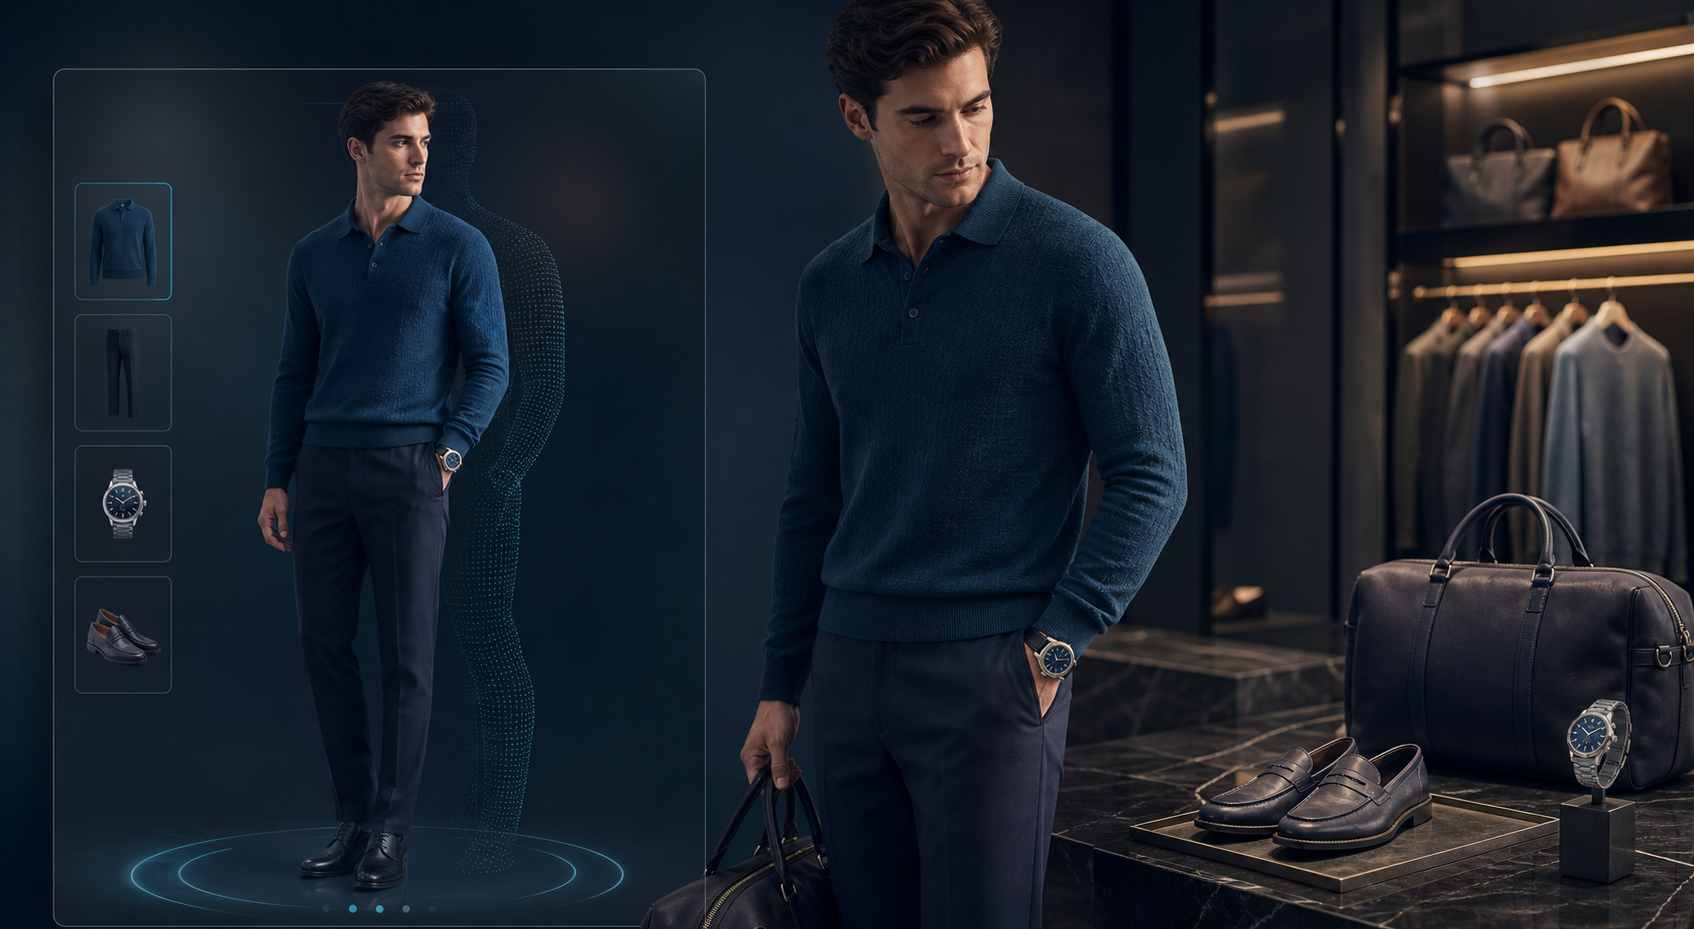
| Fashion fit and styling | AI model try-on | Shows the product on a realistic model |
| Lifestyle context | Object placement | Drops the product into a studio, boutique, kitchen, office, or outdoor scene |
| Ad testing and social | UGC video and b-roll | Adds motion without a full shoot |
| Merch or POD assets | Mockup embedding | Places designs on apparel, packaging, mugs, and more |
For fashion, accessories, and apparel, try-on usually wins because shoppers want to see shape and wearability. For home decor, cosmetics, and electronics, object placement is often the better fit because the product itself is the point.
That is also where the app becomes more than a photo editor. It lets you move from product image to product context without breaking the catalog flow.
If you want the broader marketing version of this same idea, How to Turn One Product Photo Into Studio-Ready Shopify Assets is the closest companion post.
Step 3: Keep the workflow inside Shopify
The practical win is not only better images. It is fewer handoffs. You can open the app, pick a product or upload an image, work through the edit, and publish the changes back to the product.
That makes it easier to stay consistent across the store instead of treating each visual as a one-off design task.
A good internal rule is to keep one shared standard for every product:
- One clean catalog image.
- One lifestyle image.
- One context image that explains scale or use.
- One motion asset for ads or social.
If a product can support more than that, great. If it cannot, the first three are usually enough to make the page feel intentional.
For a more lifestyle-first approach, How to Create Lifestyle Product Photos for Shopify Without a Shoot is a useful comparison.
Step 4: Turn stills into motion when ads need it
Static images do a lot of work, but they are not always enough for ad testing. A short clip can show detail, add pacing, and create a stronger scroll-stopping effect.
Supra AI Photo Studio supports UGC videos and b-roll, which is helpful when you want a product image to become a faster ad concept instead of a one-off post.

That kind of motion is especially useful when the product already looks decent and you just need a new angle for creative testing. It is less about replacing a whole production team and more about multiplying the value of one usable product shot.
If motion is the main challenge, How to Make Shopify UGC Video Variations for Ad Testing shows how to think about the testing side of the workflow.
A simple decision rule
Use the app in this order:
- Clean the image.
- Decide whether the product needs a model, a scene, or motion.
- Generate the most specific output first.
- Reuse that output across the product page, ads, and social.
That sequence keeps you from overproducing visuals you do not need.
It also makes the free plan more useful than it sounds. You can test the workflow with a small set of images, then move into the paid tiers only if the visual pipeline is actually saving time or improving conversion work.
Final takeaway: A no-shoot product photo workflow is not about avoiding photography. It is about getting more value from the photos you already have. Supra AI Photo Studio gives Shopify merchants a practical way to clean images, create lifestyle context, build model try-ons, and generate ad-ready motion without leaving the admin flow. If you want to test the idea quickly, start with one product, one cleaned image, one lifestyle shot, and one short video. That is enough to show whether the system is worth scaling.

Comments
Post a Comment