How to Build a Portable Video Template System With VideoFlow
If you keep rebuilding the same video timeline for every export path, the problem is usually not rendering. It's the template. One editor wants a different structure, the browser export wants a different code path, and the automation job wants a third format. VideoFlow avoids that drift by making the template portable: write it once in TypeScript, compile it to VideoJSON, and render the same source in different environments.
That matters if you are building marketing clips, product demos, onboarding videos, or an internal video tool. It is also why VideoFlow is useful for AI-assisted workflows: the model can generate structured scene data instead of touching a fragile timeline directly. If you want the broader framing, I covered the JSON-first setup in How to Build a JSON-First Video Workflow With VideoFlow.

1. Start With The Smallest Stable Template
Use @videoflow/core to define the first version. The core API lets you add text, images, video, audio, captions, and shapes, then chain wait, parallel, animations, and groups without tying the project to one rendering surface. Because the output compiles to VideoJSON, you can keep the template versionable in Git instead of hiding it in a GUI.
- Lock the canvas size early.
- Name reusable layers and groups clearly.
- Use the same time units everywhere.
- Keep shared assets separate from scene data.
For teams that want a concrete build order, this is also where the maintainability advice from How I Keep Video Templates Maintainable With VideoFlow becomes useful: the less the template depends on one renderer, the less painful it is to evolve later.
2. Render The Same JSON In More Than One Place
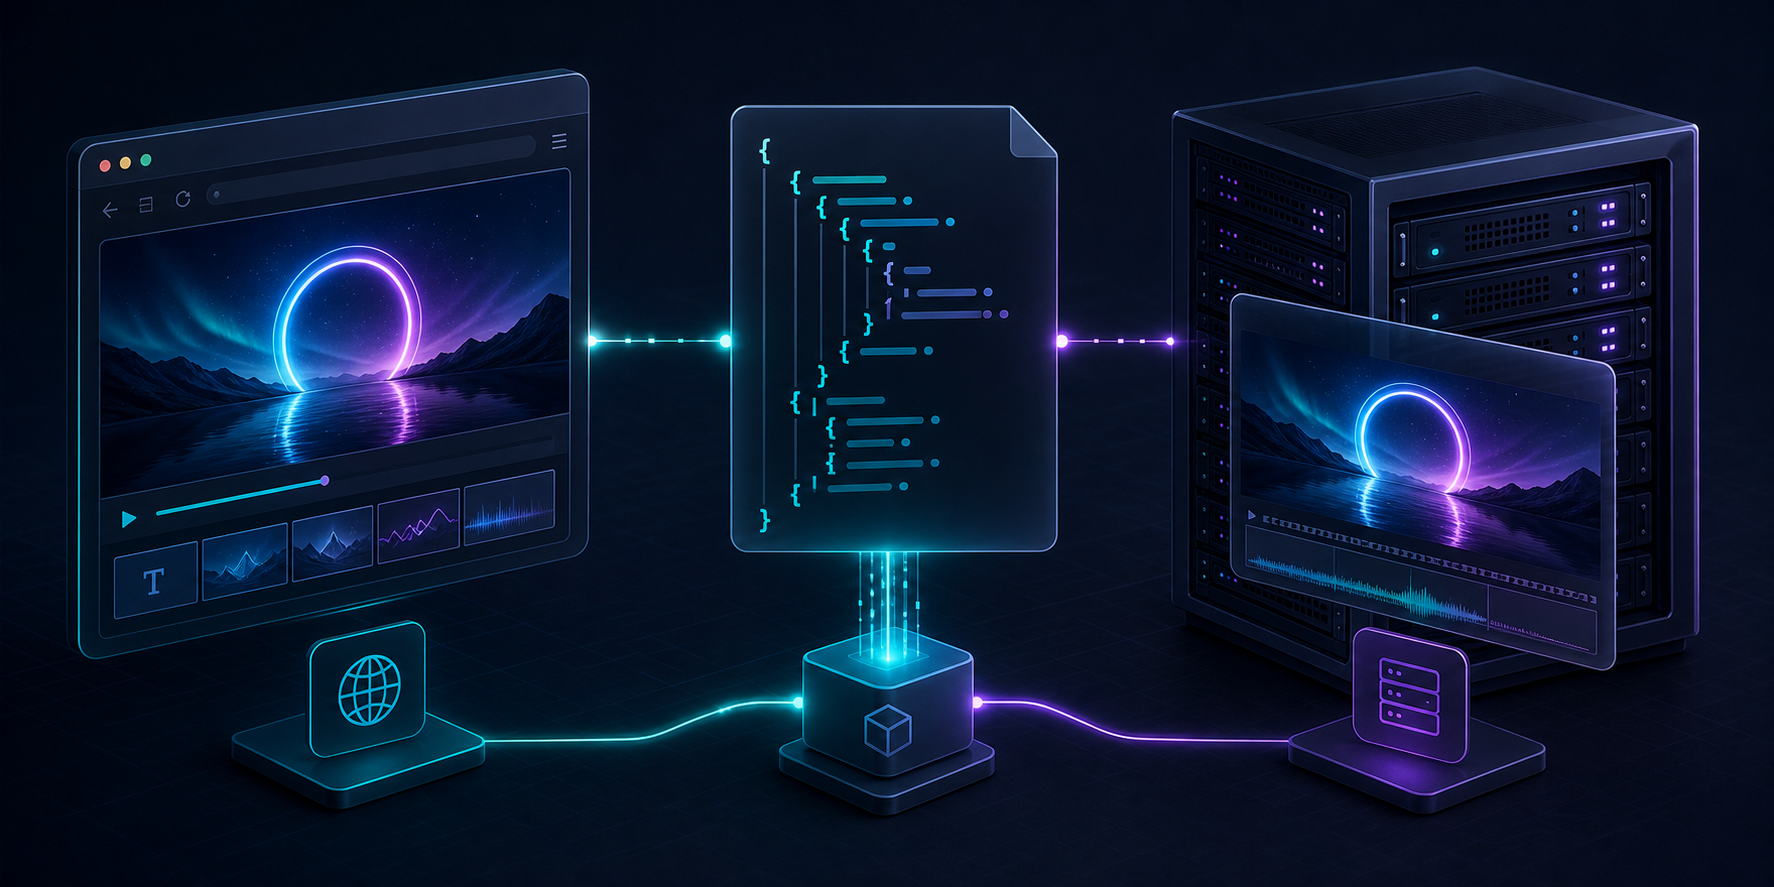
VideoFlow's renderer split is the part that makes the whole system portable. The browser renderer is useful when you want MP4 export inside a web app without shipping the source project to a server. The server renderer fits queues, APIs, batch jobs, and scheduled runs. The DOM renderer gives you a live preview that behaves like a real editor surface.
That separation is what I mean by portable: the same JSON can power preview, export, and server render without a rewrite. I went deeper on that pattern in How to Render One Video JSON in Browser, Node, and React and How to Preview, Edit, and Export the Same Video JSON Everywhere.
If you're comparing approaches, this is also the biggest difference between a JSON-first stack and a React-component-first or timeline-first workflow: the contract stays the same even when the runtime changes. If you want the project-structure angle, see How to Build a VideoFlow Project That Keeps Templates and Renderers Separate.
3. Add An Editor Only When Users Need One
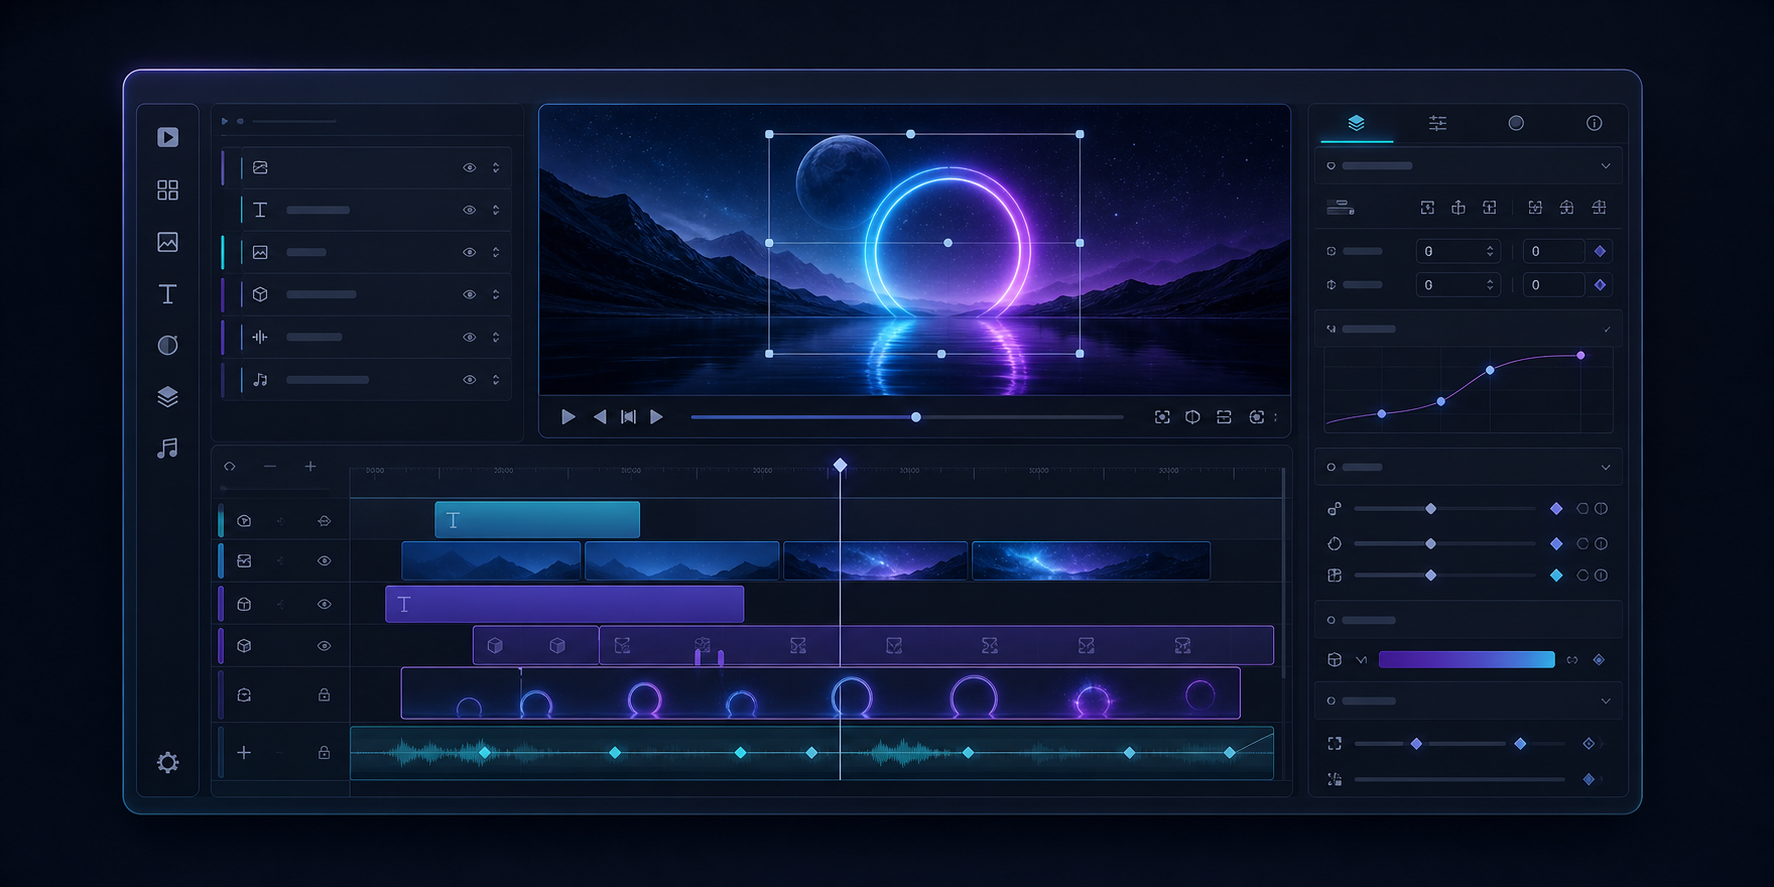
If your team needs visual editing, @videoflow/react-video-editor is the optional layer, not the source of truth. The editor adds a multi-track timeline, inspector controls, keyframes, transitions, effects, upload callbacks, undo/redo, and MP4 export on top of the same VideoJSON model.
That means the editor can help non-developers adjust scenes without forcing your backend to depend on a UI framework. You get the convenience of a visual surface, but the project still lives as data. The light, grey, dark, and night themes are useful when you are embedding it into a product rather than using it as a standalone tool.

If your product is more about operations than creative editing, the editor can stay out of the first release. When you do need it, the JSON contract keeps the implementation from drifting into a separate codebase.
4. Make It Easy For AI And Automation To Fill The Gaps
Once the structure is stable, AI and automation become much safer. A model can generate scene descriptions, captions, or variable values without deciding layout from scratch. A workflow can pull in product data, CRM fields, support answers, or a brief, then populate a known template. That is a much better fit for automation than handing an agent a blank timeline.
If you are building from store data or campaign metadata, the practical version of this pattern is the workflow I described in How I Turn Product Data Into Automated Video Demos With VideoFlow: the template does the visual work, and the data only fills the slots.
This is where VideoFlow feels like infrastructure instead of just a renderer. The model is not "make a video"; it is "fill a known structure and render it safely."
5. A Practical Build Order
- Build one short template in core and compile it to VideoJSON.
- Render it once in the browser and once on the server.
- Add a live DOM preview if you need a review surface.
- Only add the React editor if non-developers need to modify scenes.
- Wrap the inputs in data adapters after the template is stable.
If you need examples while you work, the examples gallery and the playground are the fastest way to test whether a scene is portable before you commit to a larger workflow.
What To Standardize First
- Canvas size and aspect ratio.
- Layer naming and grouping.
- Reusable intro and outro scenes.
- Fallback states for missing data.
- Asset paths and upload rules.
- Render settings for browser and server jobs.
If you standardize those pieces early, the template stays portable instead of turning into a renderer-specific one-off. That is the real payoff: less rewrite work, fewer broken exports, and a cleaner path from brief to MP4.
For the full product reference, start with the VideoFlow homepage, then read the docs, the renderer docs, and the React video editor page if you plan to embed editing later. The source is on GitHub under Apache-2.0.
Next step: build one portable template, render it in two environments, and only then decide whether you need a visual editor or automation layer.

Comments
Post a Comment